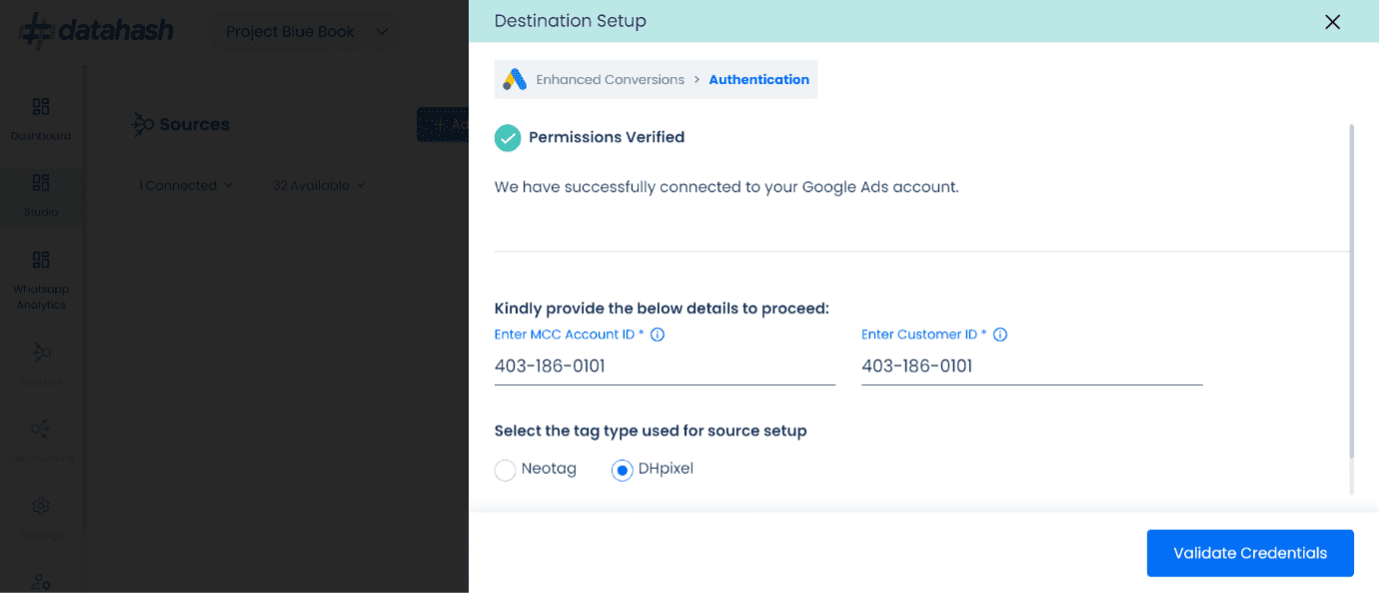
Let’s go through the process required to set-up Google Enhanced Conversions for Web.
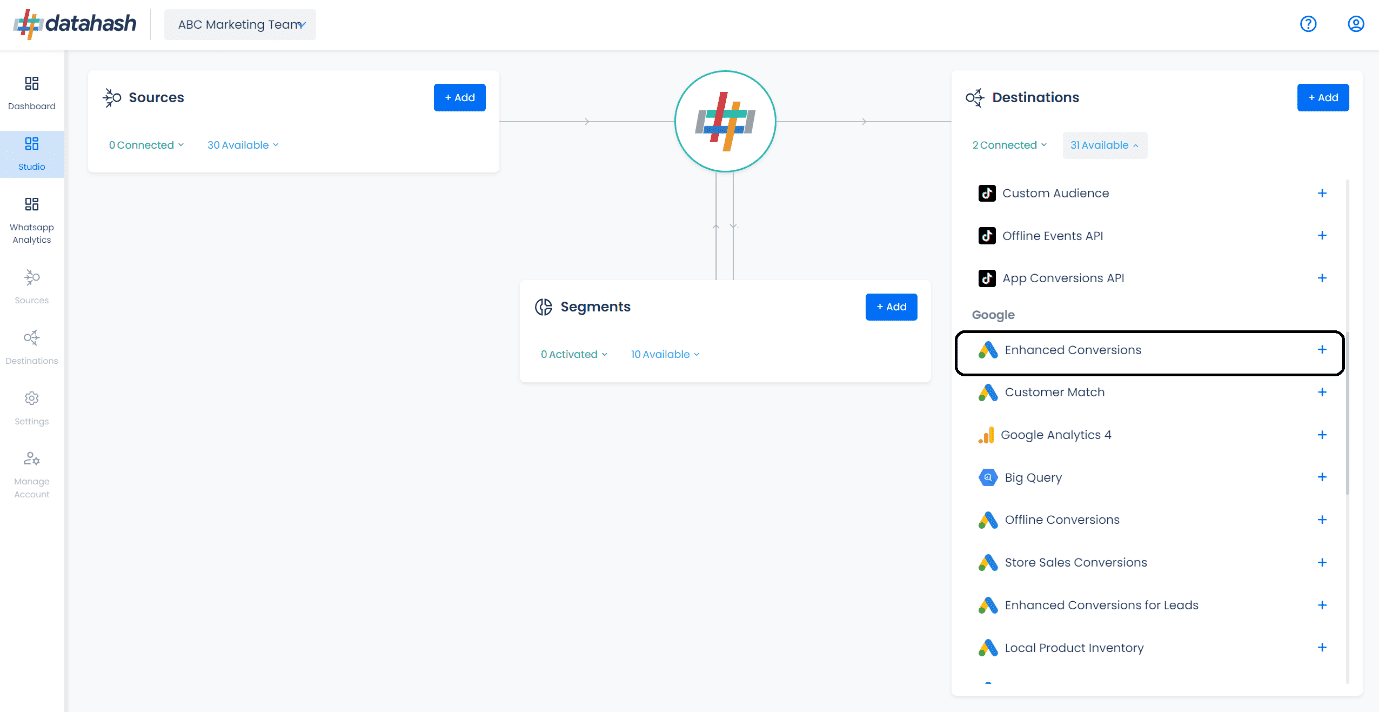
- Log in to your Datahash account and open the Studio interface. Click on Enhanced Conversions connector button under the Destinations section on the right.
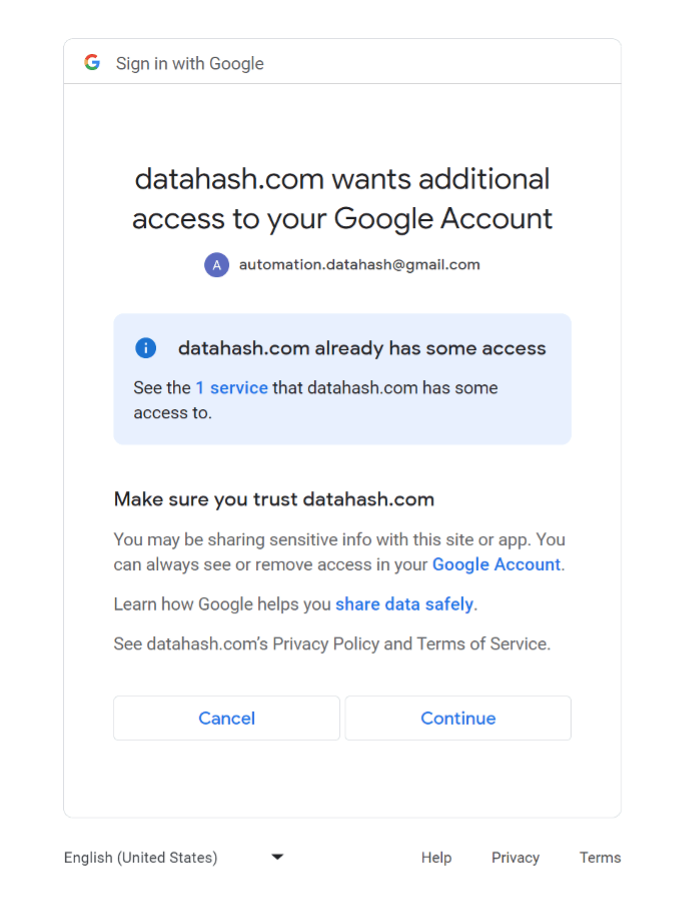
- Click on the “Sign in with Google” button to start the set-up

Important: Datahash ensures that, data from Google APIs when used or transferred to any other app complies with the Google API Services User Data Policy including the Limited Use requirements. - The Google login and permission flow will be initiated. Log in to or select the Google account through which you have access to the Google Ads account, where Enhanced Conversions is required to be implemented. After Logging in, click on “Continue”.
- Provide the Customer ID and MCC account ID of your Google Ads account
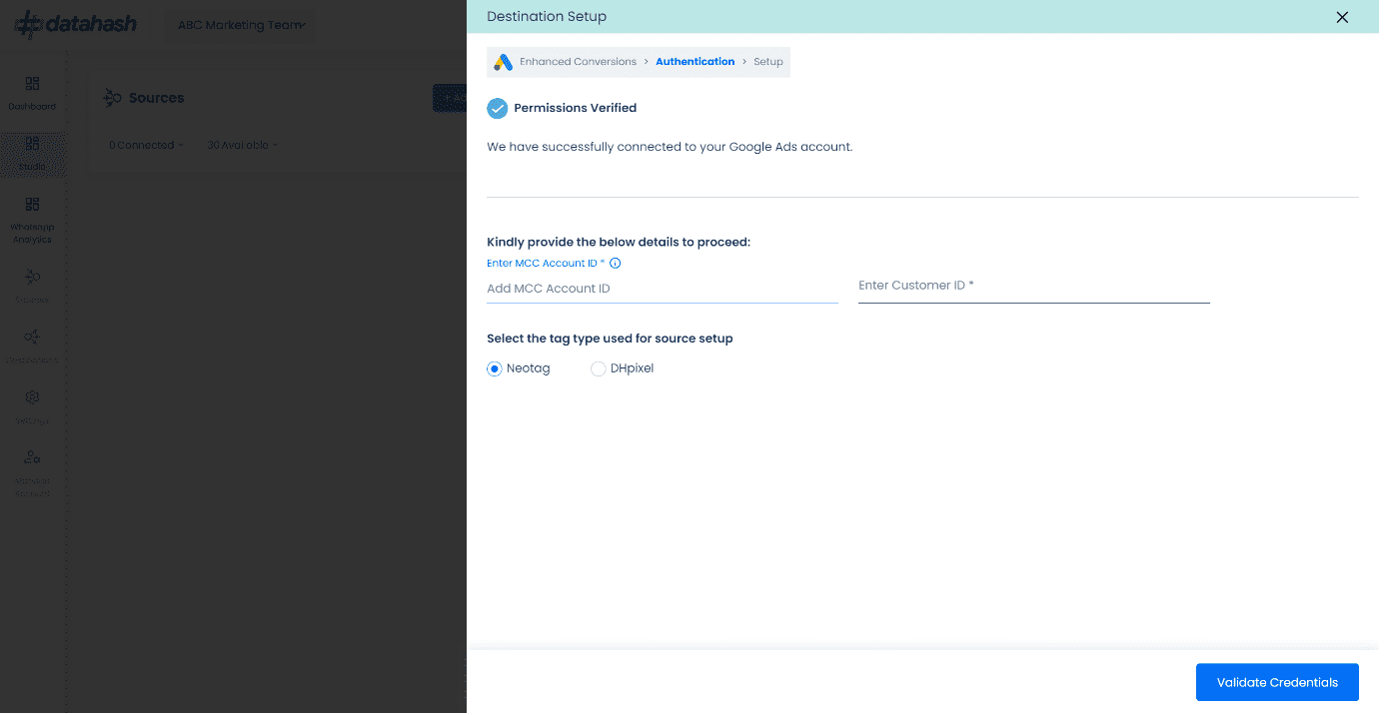
Customer Account ID: ID of your Google Ads Account.
MCC Account ID: The MCC account id is the manager account customer id. - Choose the mode of tag set-up:
Option 1: NeoTag (Recommended in case of multi-platform set-up)
Input the MCC and Customer ID and click on validate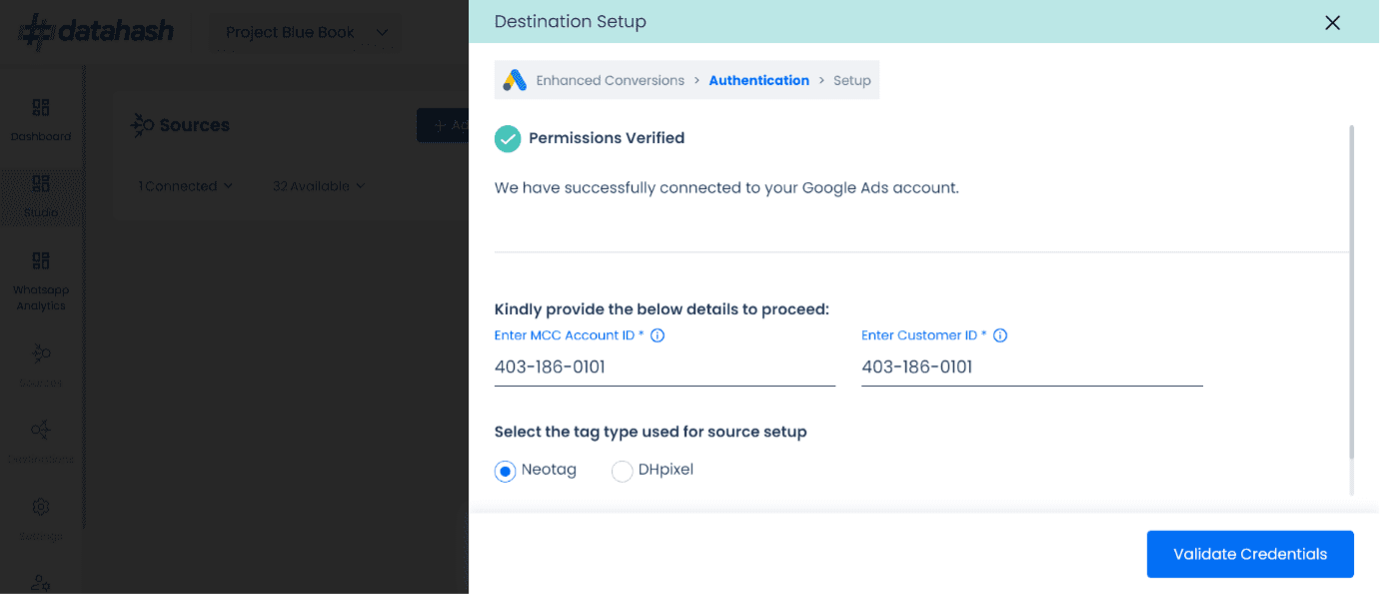
Once validated, you will land on the screen where you will be required to provide the mapping of the conversion action names which you want to send to the destination.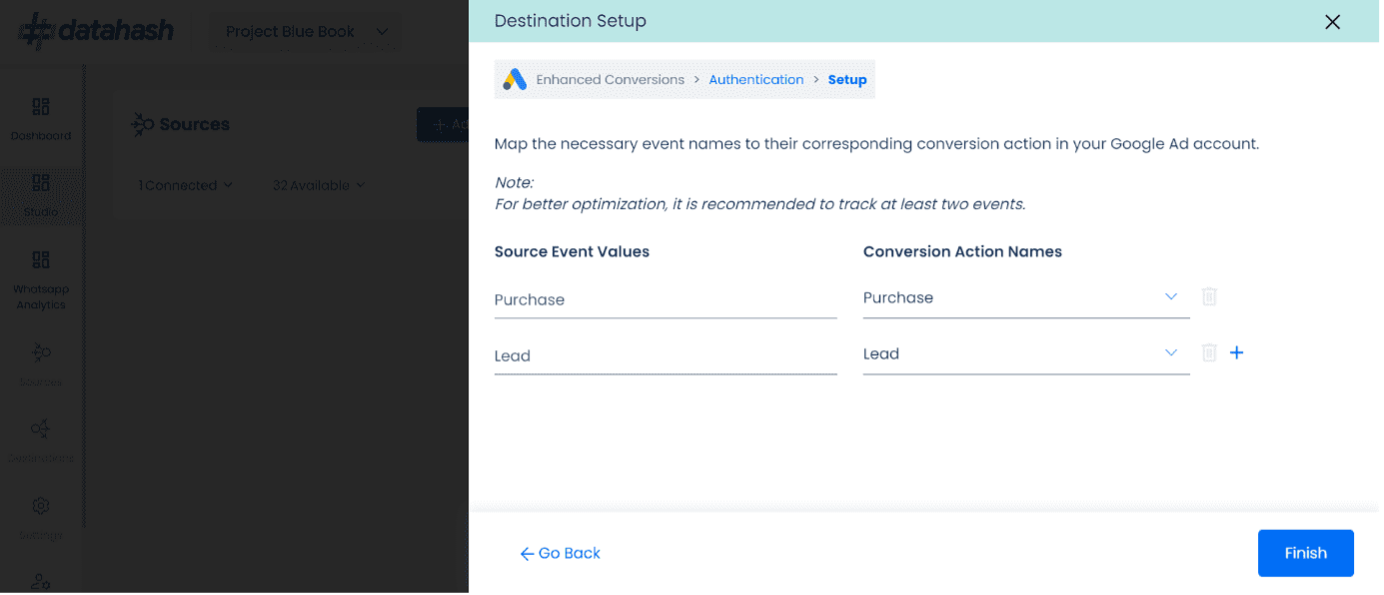
On the left you find the event names which you would have setup while integrating with Datahash and on the right you can find conversion action names which you have setup in your Google Ads account. Select the event names which you would like to send from your website and map them to their corresponding Conversion Action name in your Google Ads account.
You can add more events using the plus icon available. There is a requirement of adding at least 2 events for better optimization. Until you add minimum of 2 events, the ‘Finish’ button won’t get activated. You can even map the different event names from your source to a single conversion action name in your Google Ads account. This lets you give more flexibility in terms of playing around with events and help you consolidate your events better.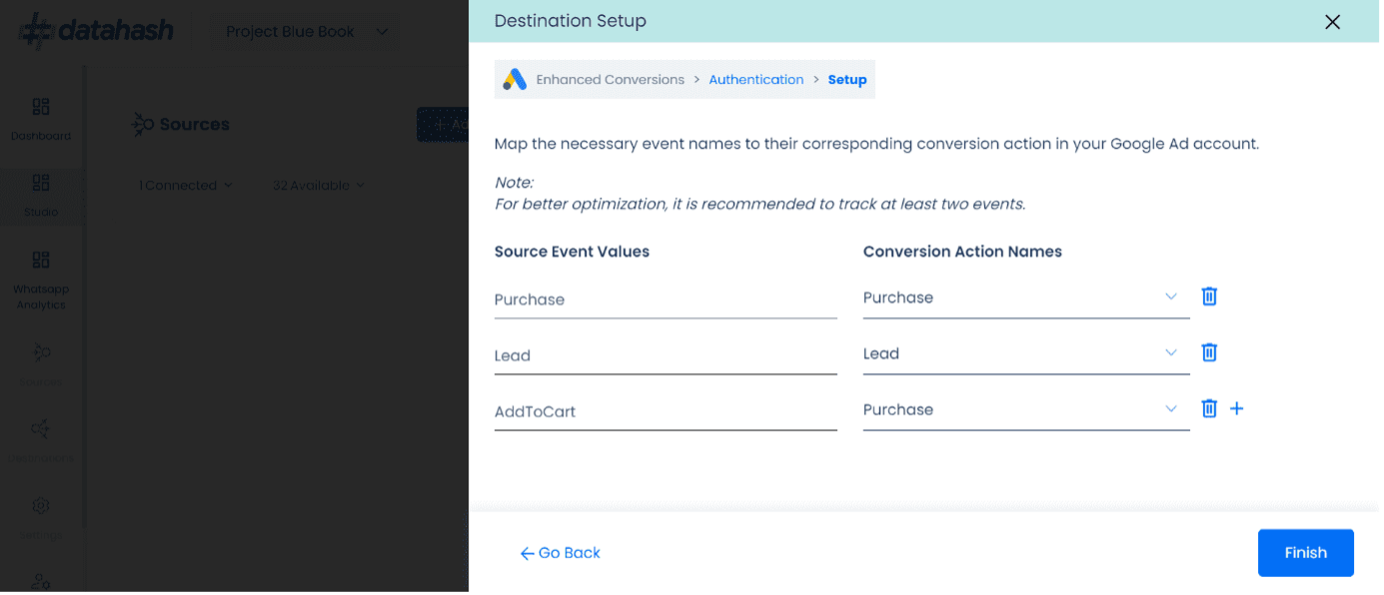
Click on ‘Finish’ to complete the setup. The set-up is now complete, you can see events flowing in your Google Ads account in sometime.
Option 2: DhPixel (Recommended in case only Google Enhancedd Conversions set up is required)
Input the MCC and Customer ID and click on validate. Once validated, Click finish to complete the setup.