
- Go to https://studio.datahash.com/login
- Enter your credentials to log in
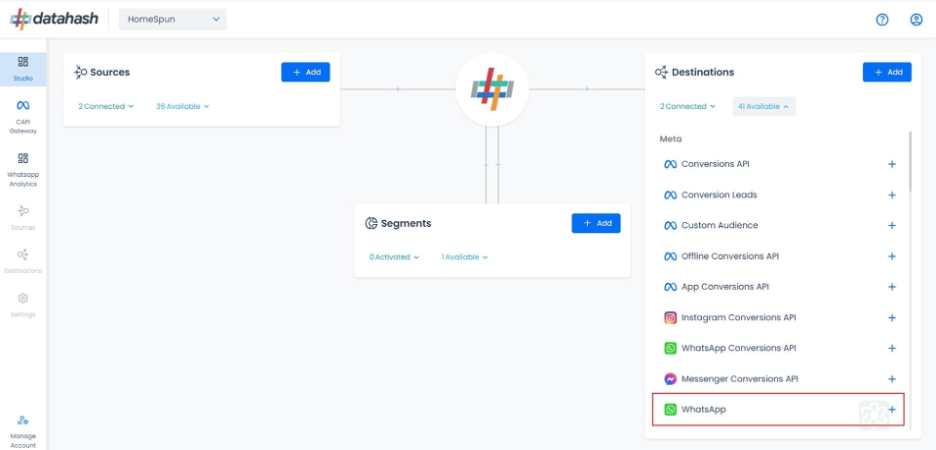
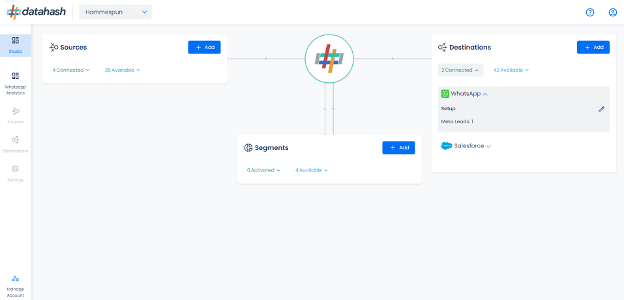
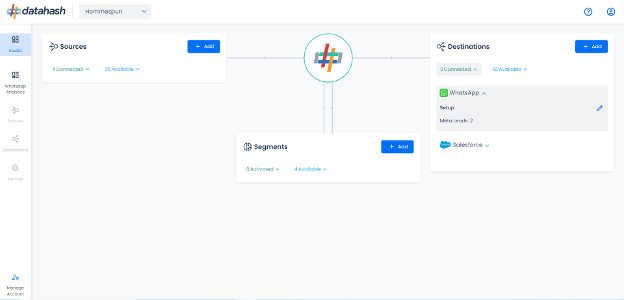
- Navigate to Meta category under Destinations list in the right section.
- Click on the “WhatsApp” connector tile
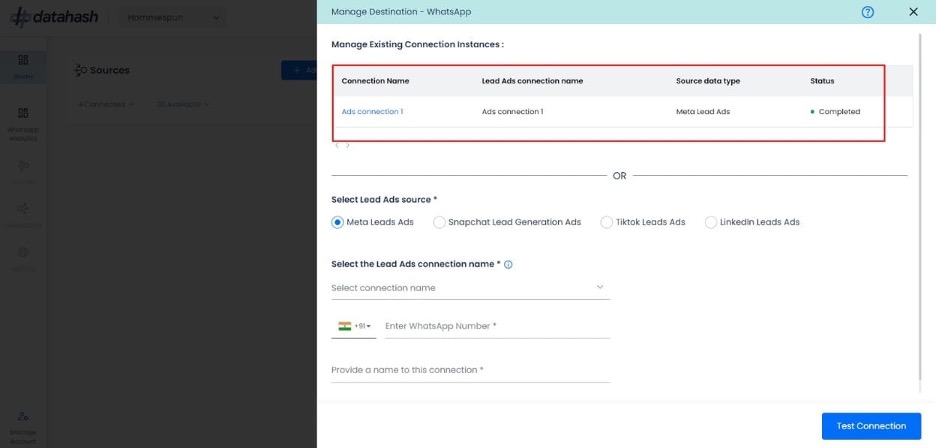
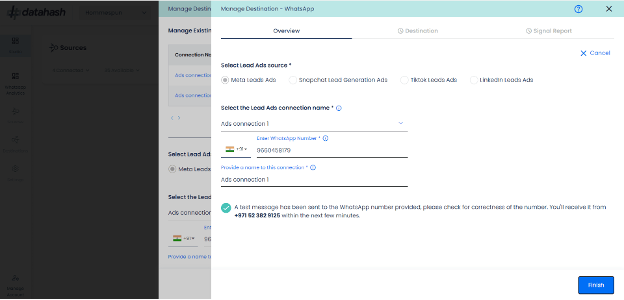
Select the Meta Lead Ads source type
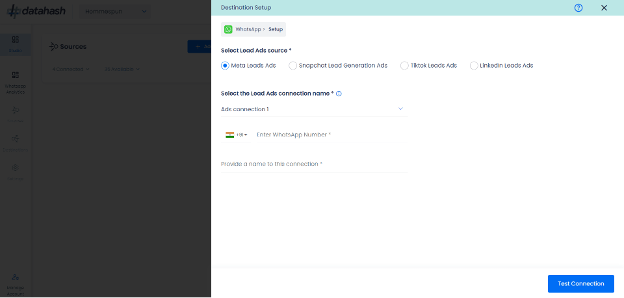
- Now select the connection name you want to integrate and provide a name to it. This is the same connection name you have already connected in the Source connector (Meta Lead Ads Source).
- Enter the WhatsApp number where you would like to receive the leads.
- Once done, provide a name to this connection.
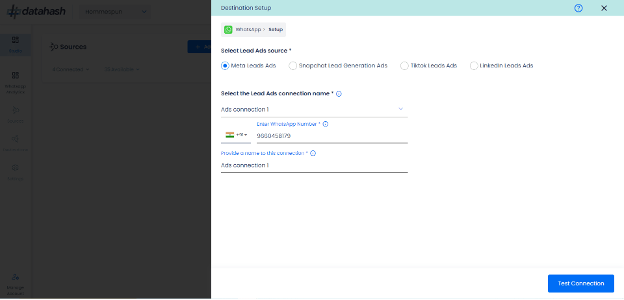
Click on Test Connection. You will receive the WhatsApp message in a few minutes on the provided number.
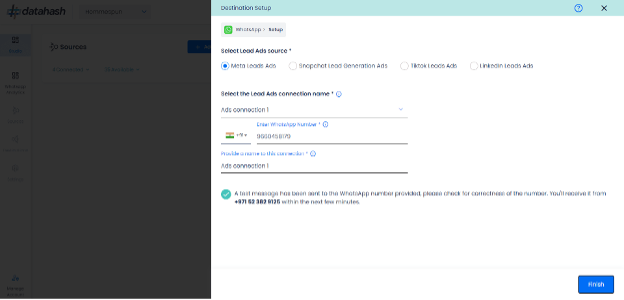
Click on Finish to complete the setup.
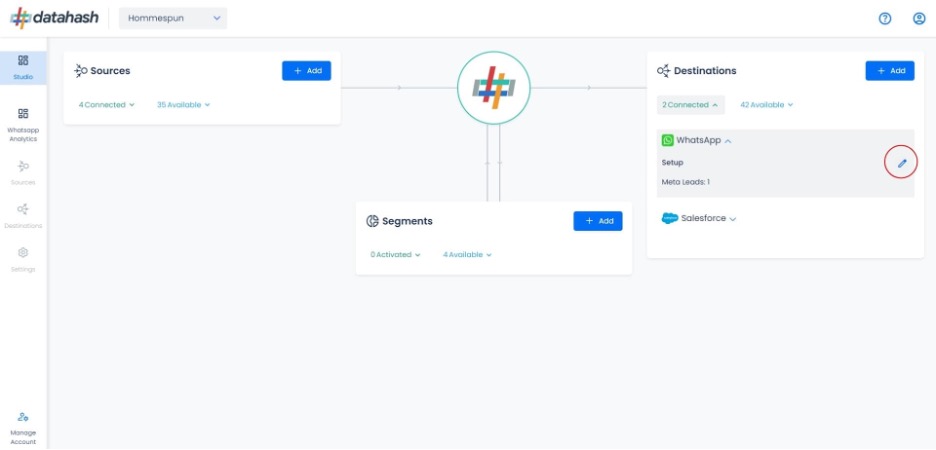
You can see the connected instance in the dashboard.
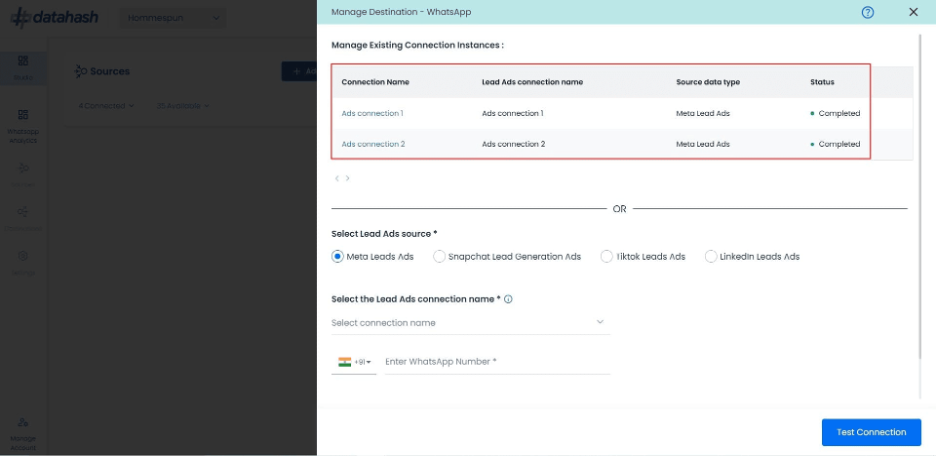
Adding New Instances and Editing Existing Instances:
- To add another instance or edit the existing one, click on the Edit icon to open the RACS for the Manage connections.
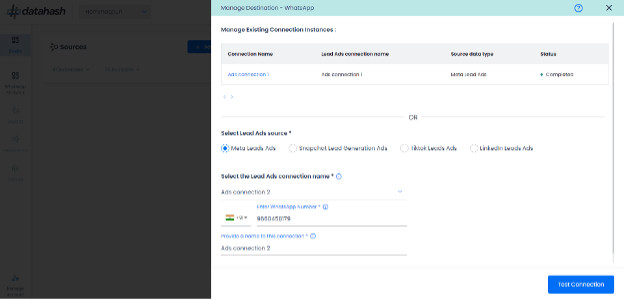
Adding a new instance:
- Start the same setup as done above by selecting the lead ads source type and other required fields.

Once done, click on Test Connection. You will receive the WhatsApp message in a few minutes on the provided number.

Click on Finish to complete the setup.

You can see the newly created instance “Ads connection 2” in the manage existing connection instances table.
Editing an existing connection instance:
- Click on the connection name in the manage existing instances table to open the setup.
- Click on the ‘Edit’ icon available at the top right corner to enable the edit mode.
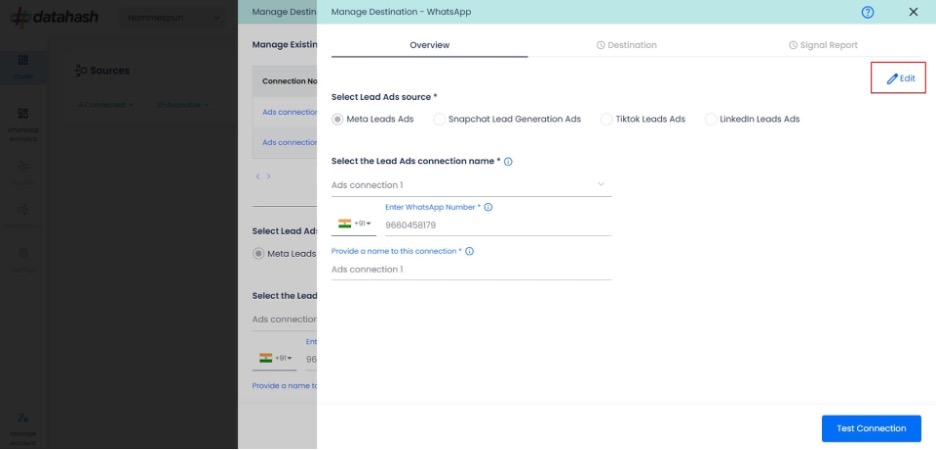
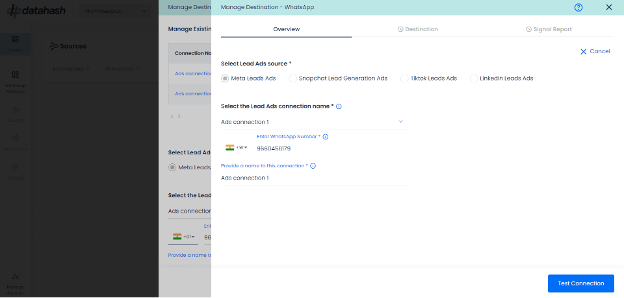
Choose the field value/values which you would like to update.
- Once done, click on Test Connection. You will receive the WhatsApp message in a few minutes on the provided number.
- In case you click on ‘cancel’ during the edit flow, and closes the setup, the previous configuration will keep running as it is. The updates are pushed only when you click on the Finish button.
- Click Finish to complete the setup.