NS Records
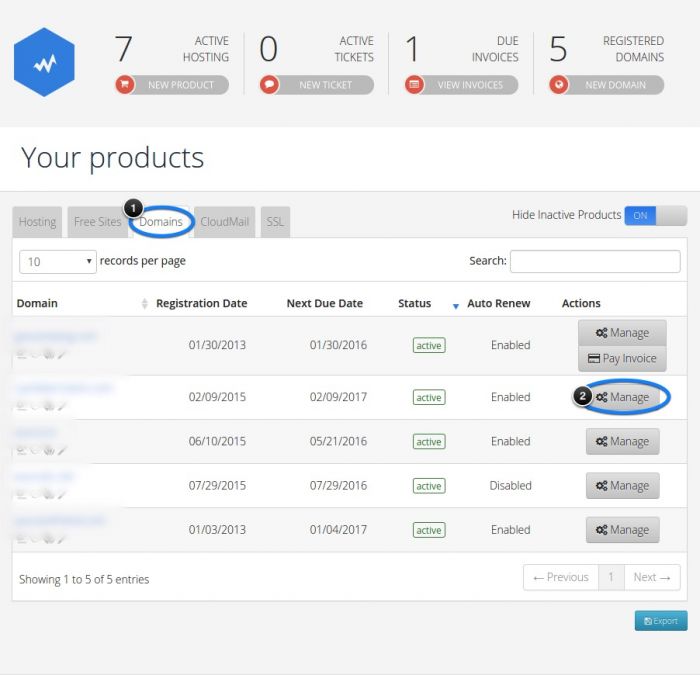
Step 1: To begin, log into your Cloud Control Panel™(CCP) and click on the “Domains” tab in your dashboard. Locate the domain that you’d like to work with and click on the “Manage” button.

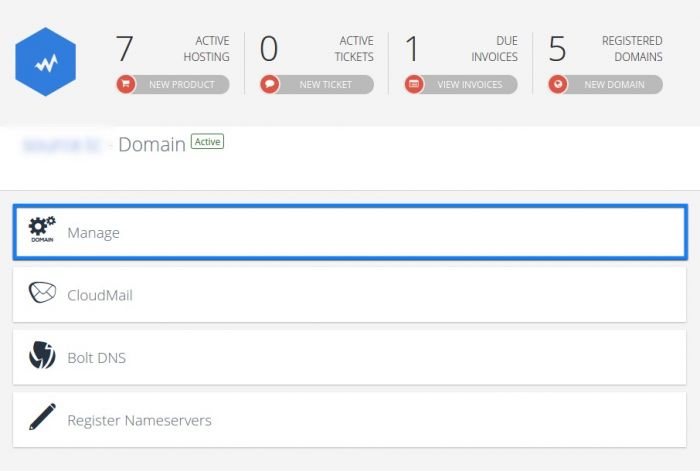
Step 2: On the next page, click on the “Manage” button.

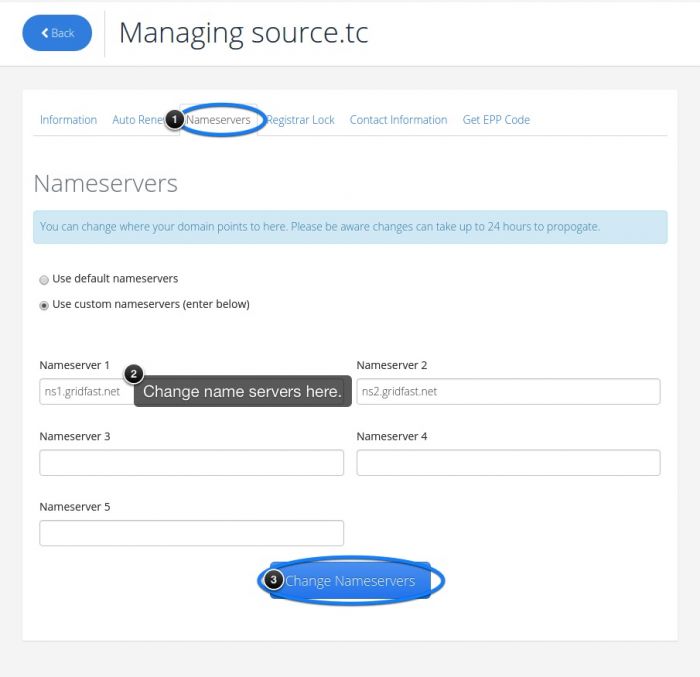
Step 3: On the “Managing” page, click on the “Nameservers” tab. Enter the NS Record based on the information provided in the Datahash set-up window. Click on Change Nameservers.

Step 4: Repeat for all 4 NS records provided by datahash
CNAME Records
Step 1: To add the CNAME record, log into the CCP, click on the “Domains” tab below “Your products” and click on the “Manage” button for the domain name that you’d like to work with.
Step 2: In the next window, click on the “Bolt DNS” option.
Step 3: Choose type as CNAME. Copy the CNAME record value shared by datahash and paste the same in the domain manager. Click on Add this record.
Step 4: You’ll be asked to verify that you’d like to add the record. Select “Ok”.
Step 5: You’ll receive a message letting you know that you successfully added the record.


