NS Records
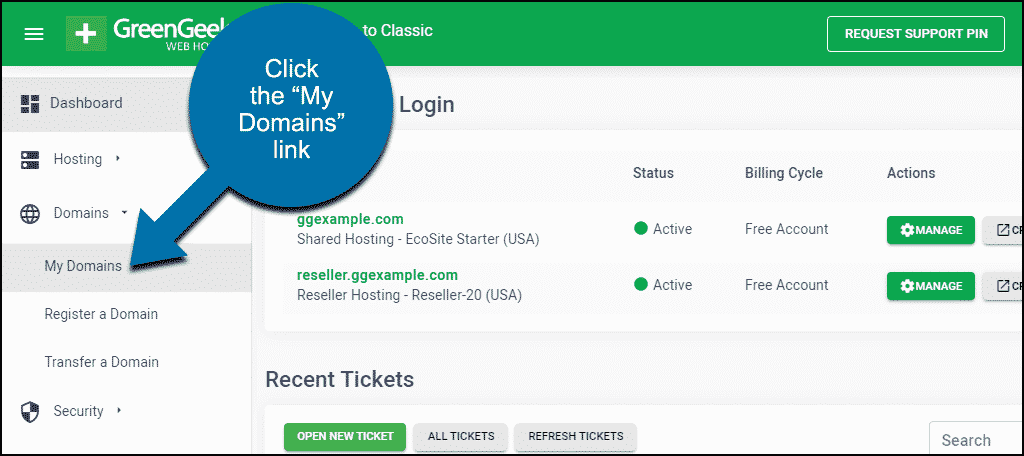
Step 1: Go to GreenGeeks & Login to your account. Click the “My Domains” link in the navigation menu.
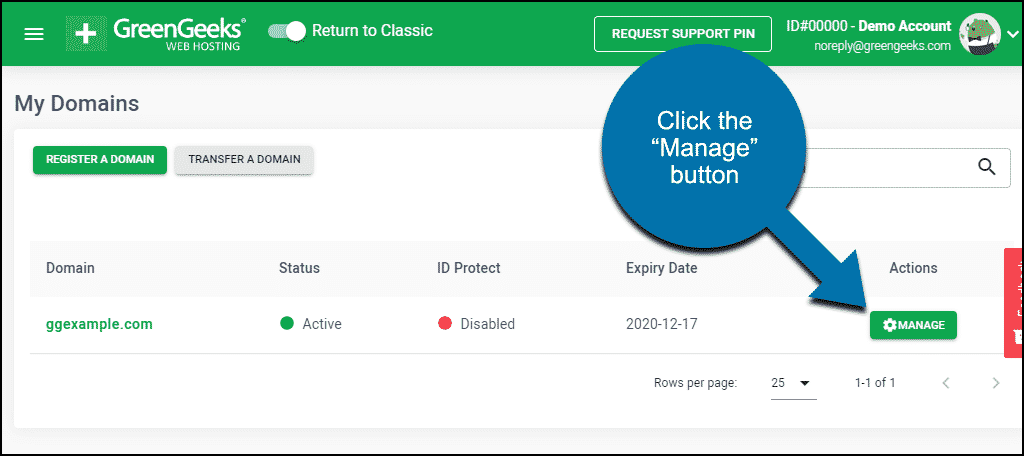
Step 2: Click the “Manage” button for the domain you are working with.
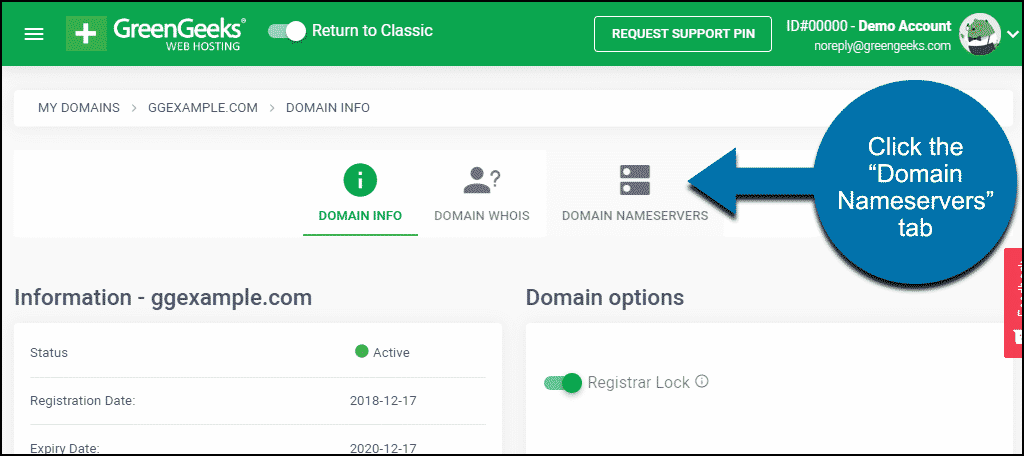
Step 3: Click the “Domain Nameservers” tab.
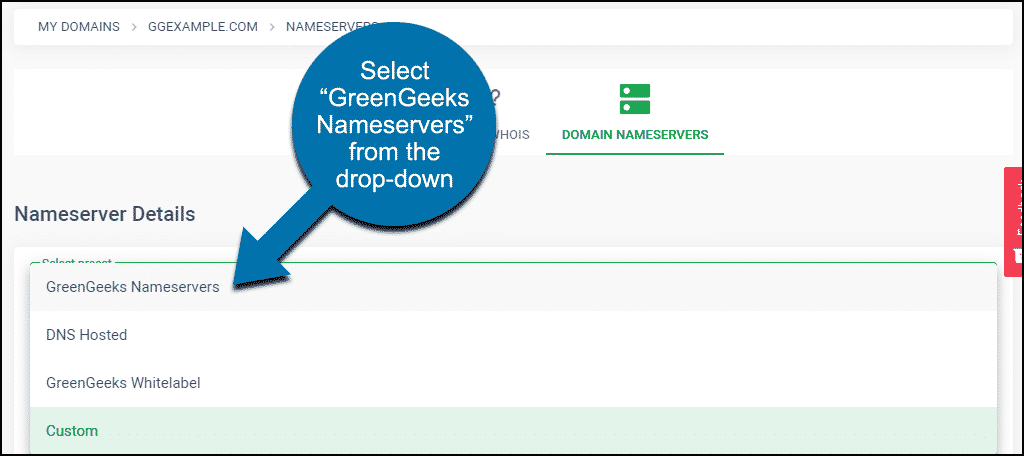
Step 4: You can select “GreenGeeks Nameservers” or “GreenGeekks Whitelabel” or “Custom” from the drop-down, and the fields will be populated for you.
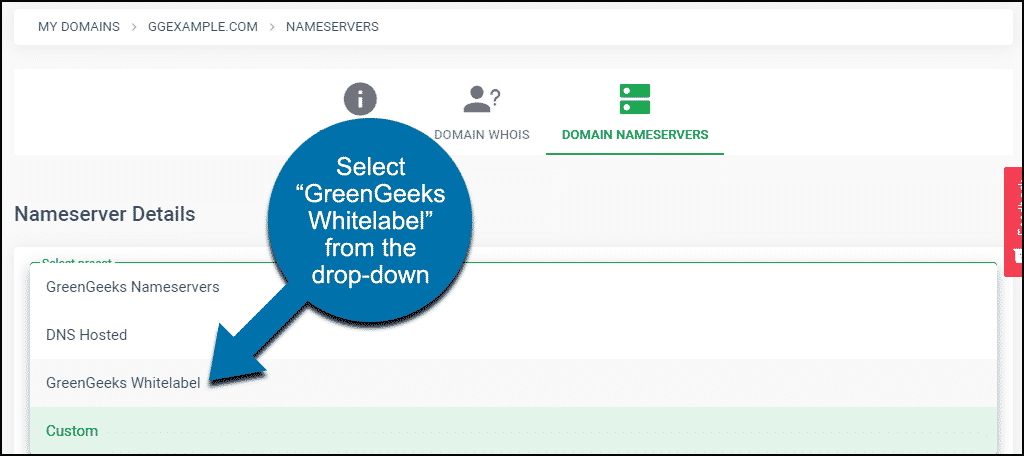
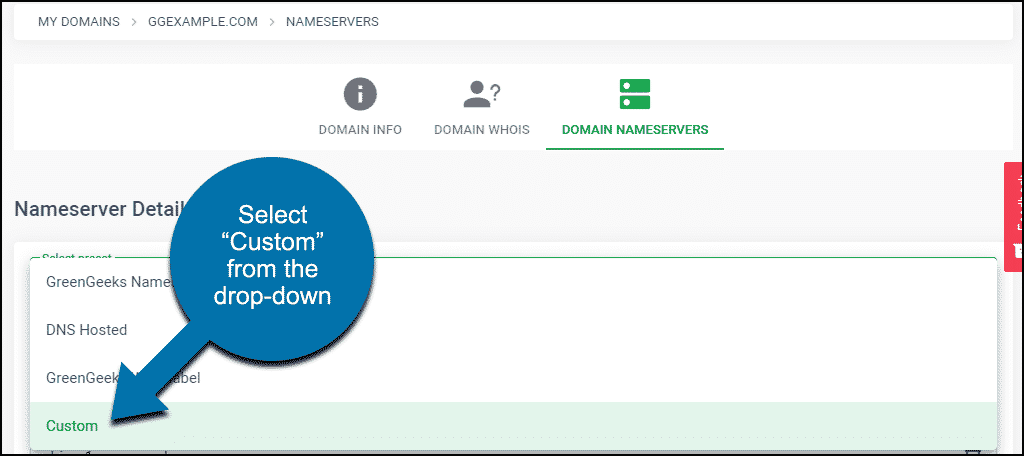
Step 5: Enter the NS record based on the information provided in the Datahash set-up window. Click the “Save Changes” button to save the name server settings.
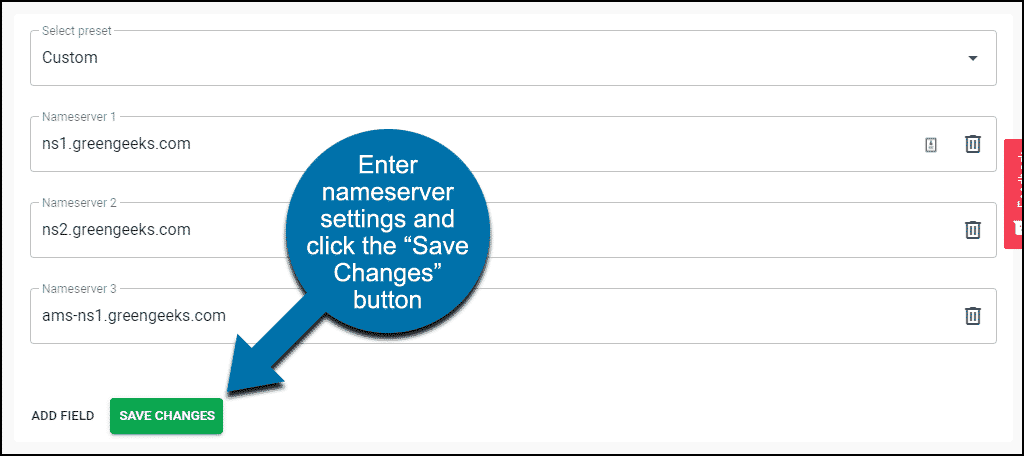
Step 6: Repeat for all 4 NS records provided by datahash.
CNAME Records
Step 1: To access the DNS Zone Editor, log in to your GreenGeeks Dashboard and go to cPanel by clicking the “cPanel Login” button in the “Quick Server Login” section.
Step 2: In cPanel, locate the “DOMAINS” section and click the “Zone Editor” link or icon.
Step 3: Choose CNAME record type & copy the CNAME record value shared by datahash and paste the same in the domain manager. Submit the details.


