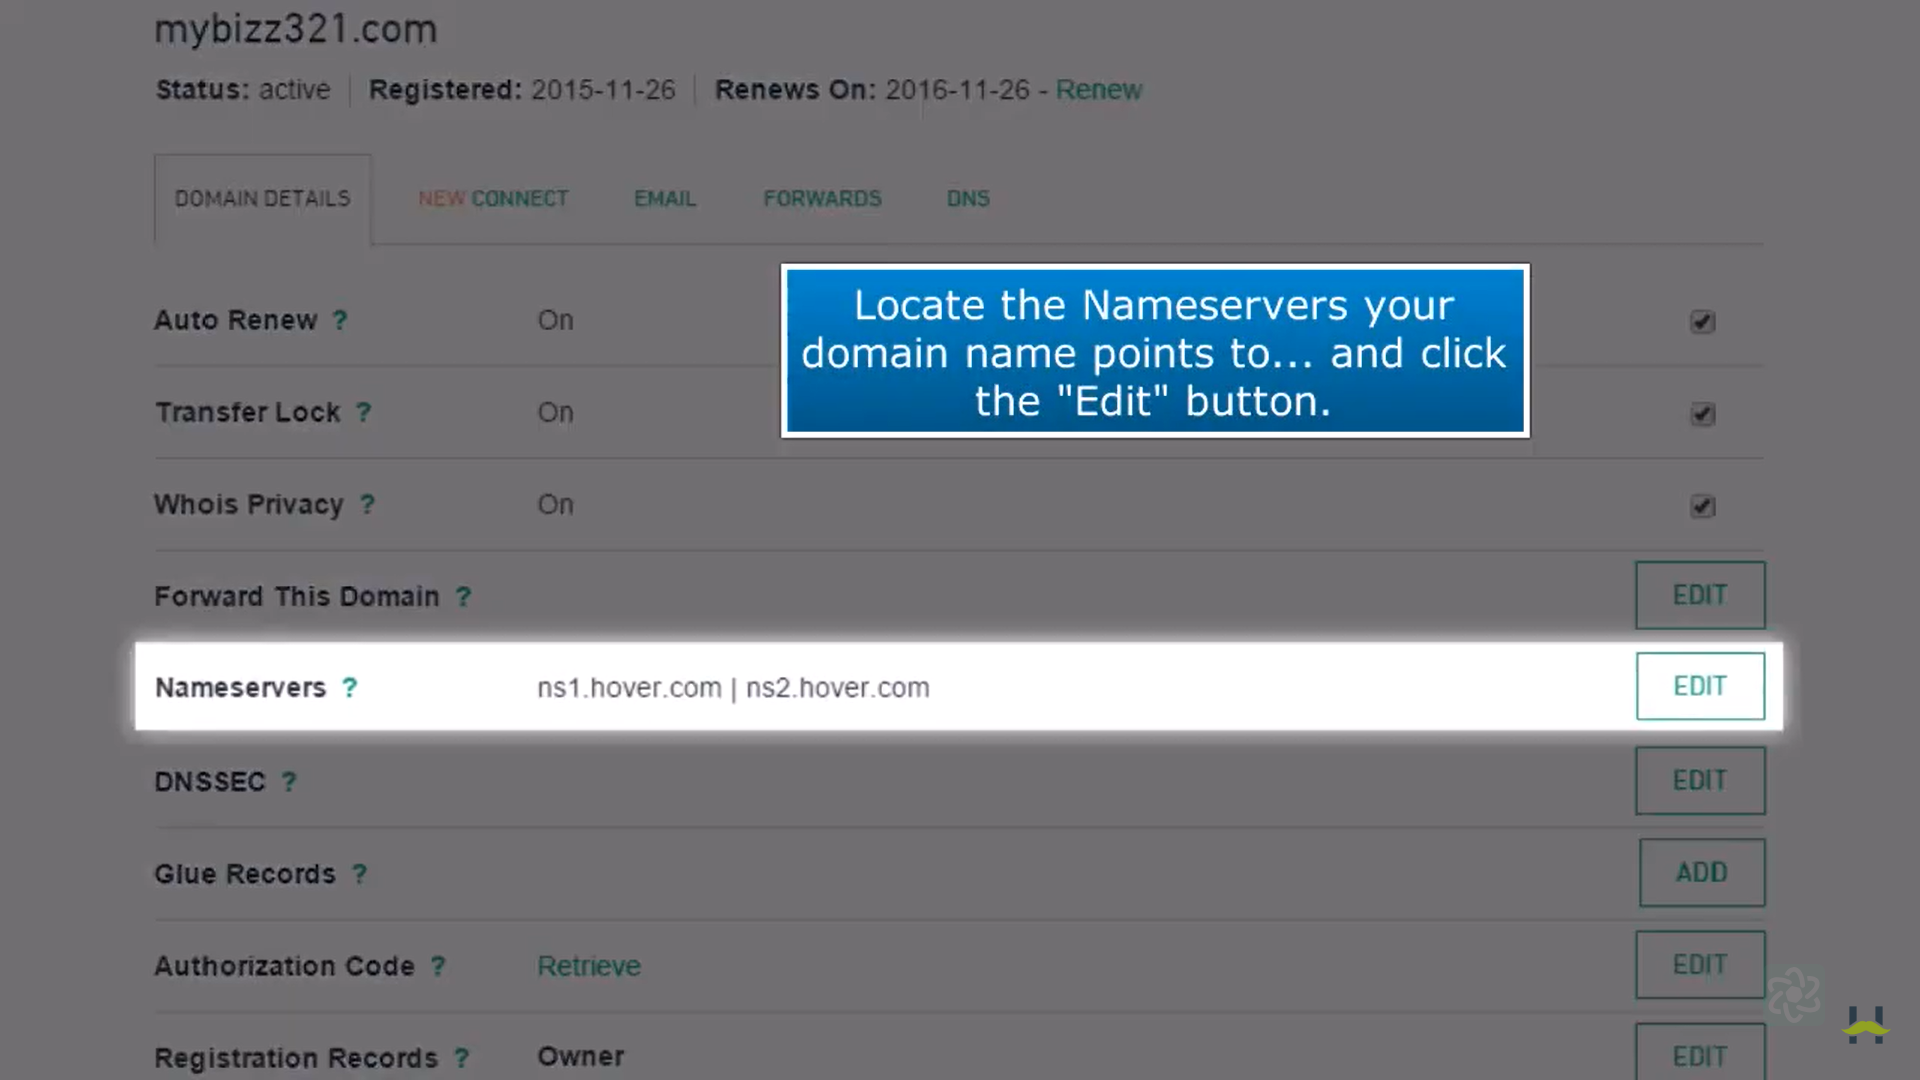
NS Records
Step 1: Open your web browser and navigate to hover.com. Sign in to your account

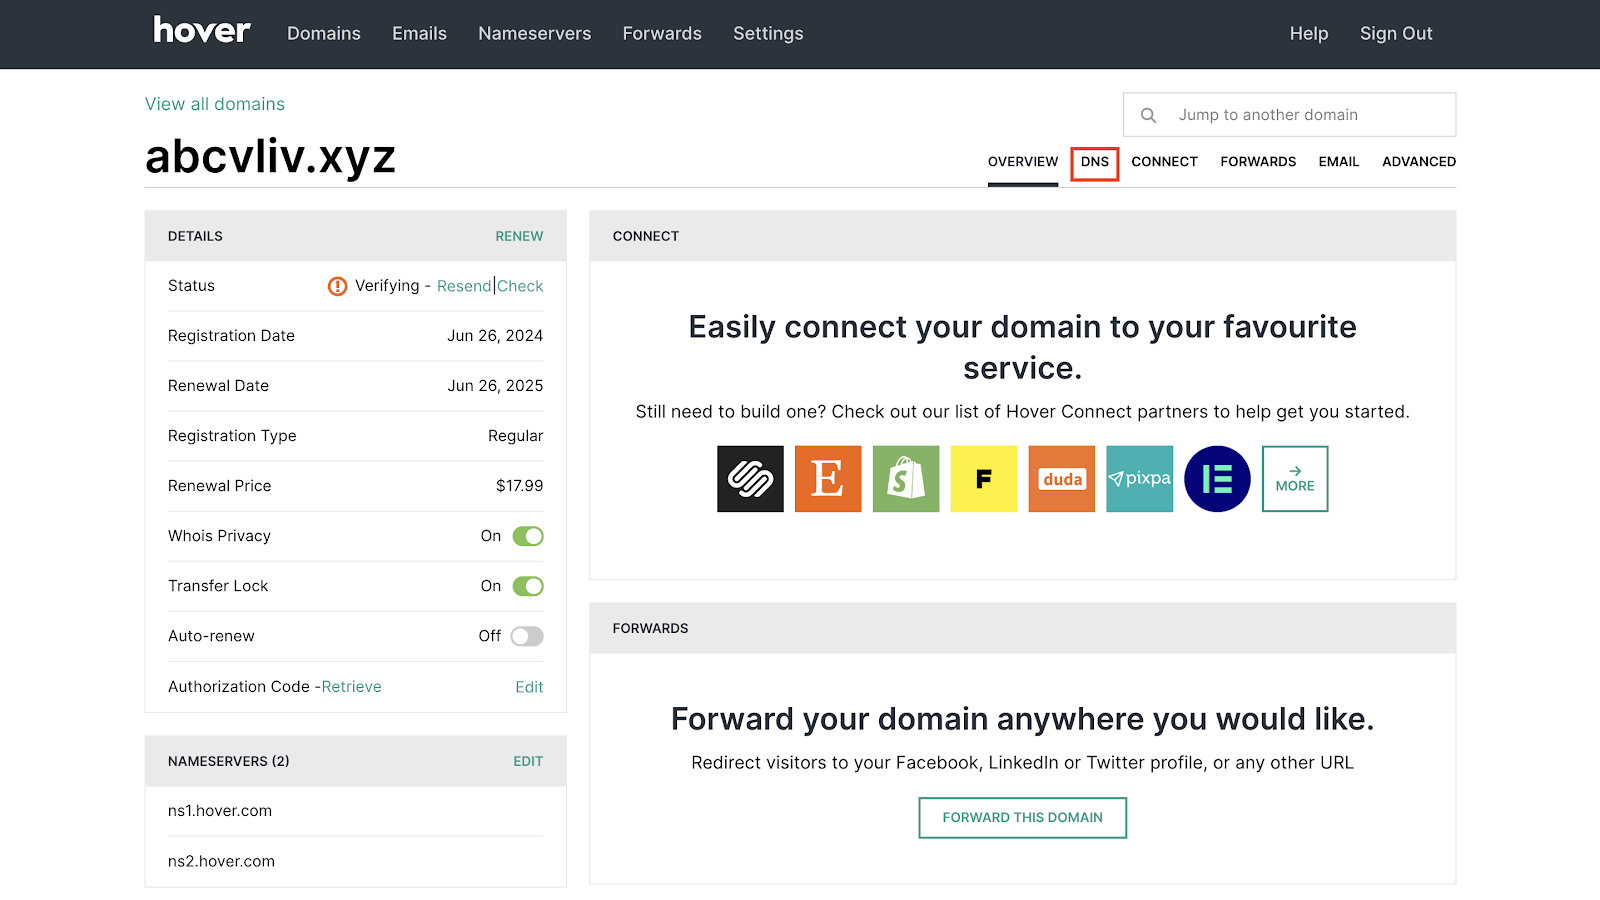
Step 2: Choose the domain where records are to be added. Locate the Nameservers in Domain details. Click on Edit
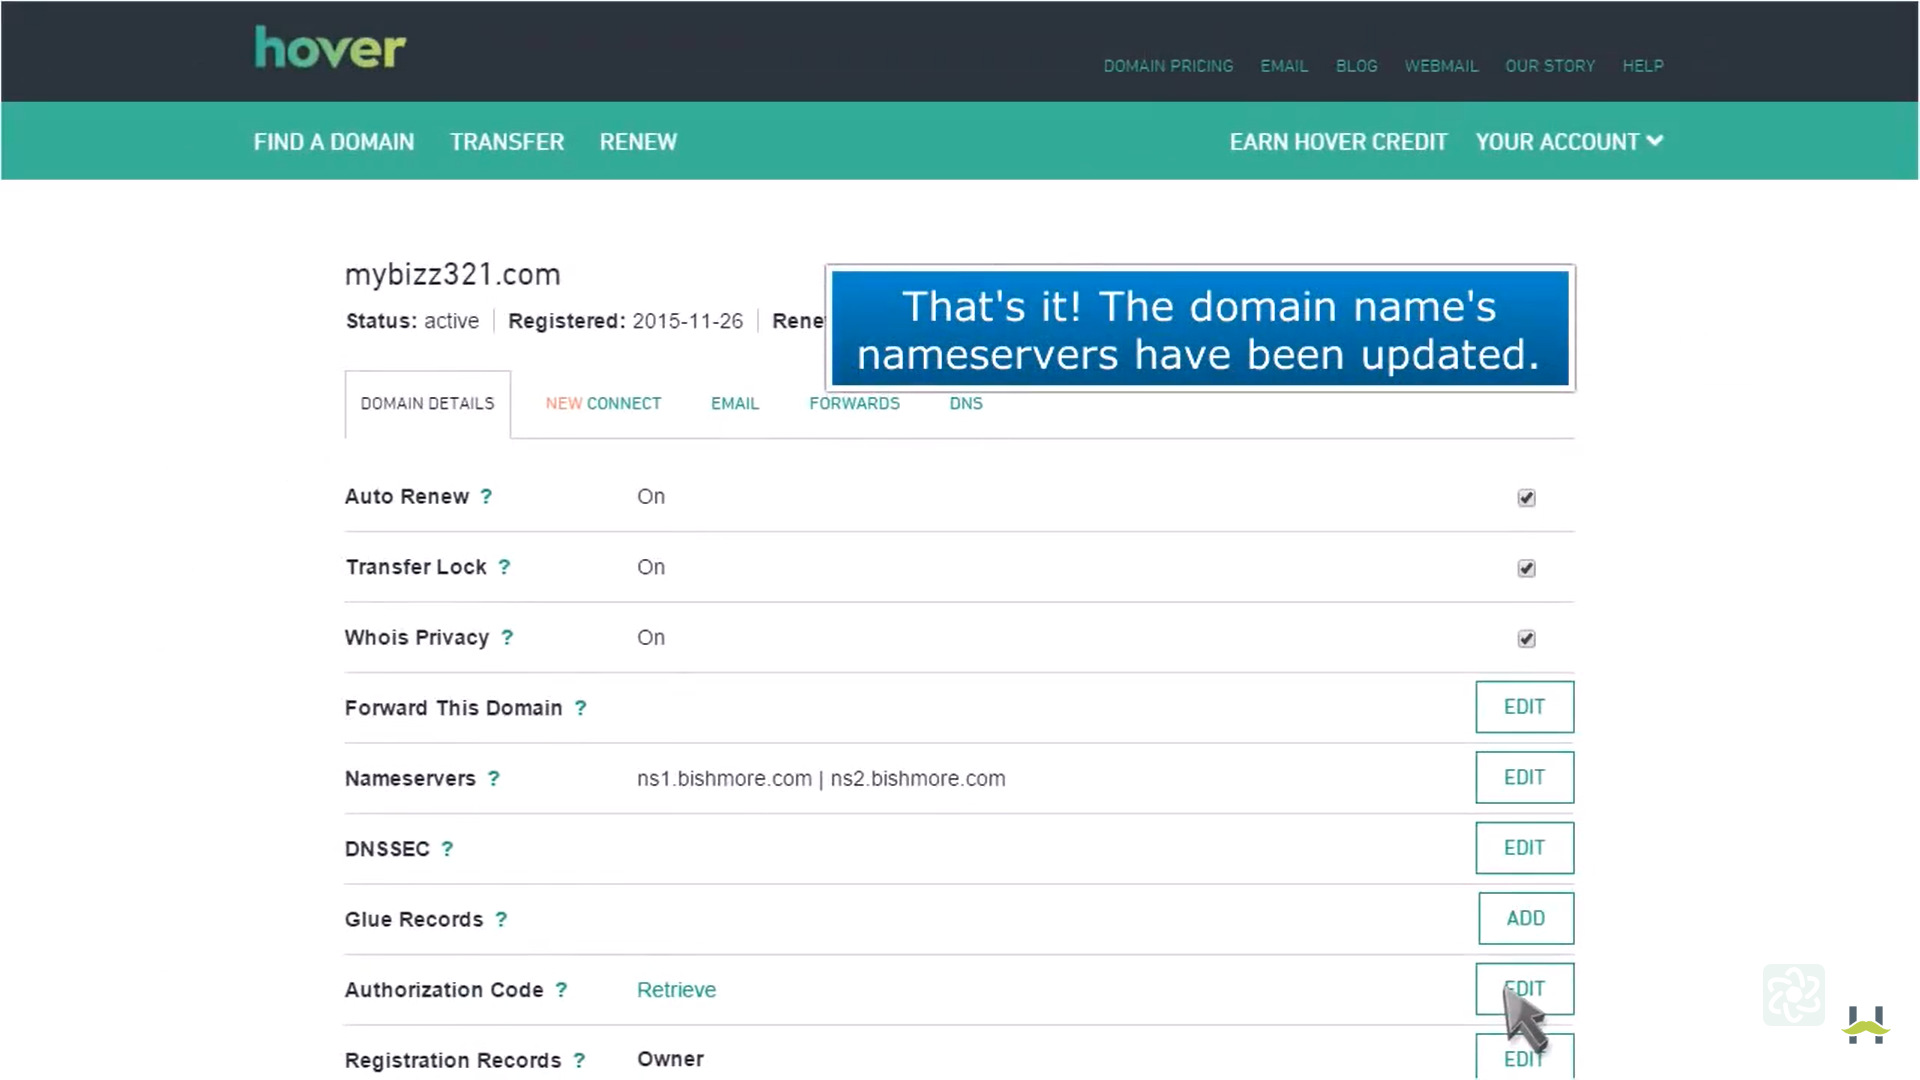
Step 3: Enter the NS Record Name and Value based on the information provided in the Datahash set-up window and Save the record. Click on Save.
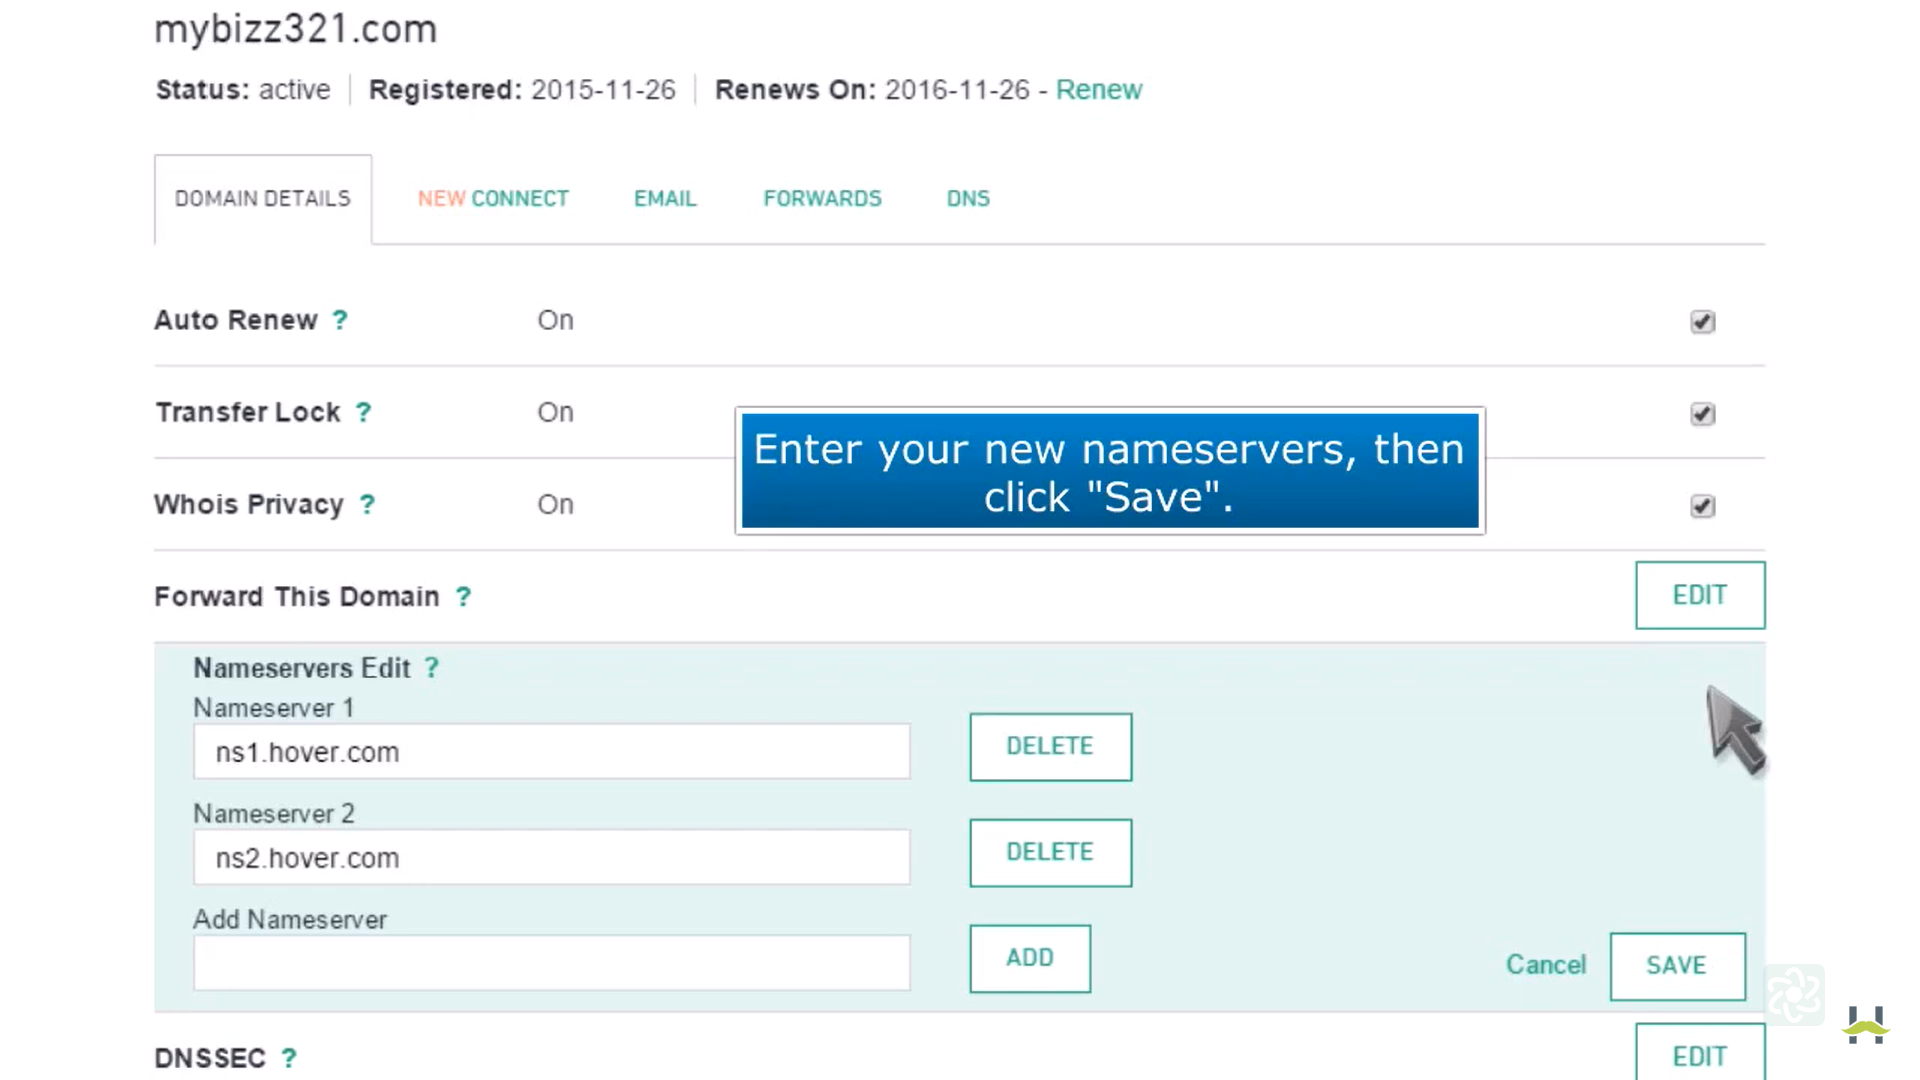
Step 4: Repeat this process for all 4 NS records.
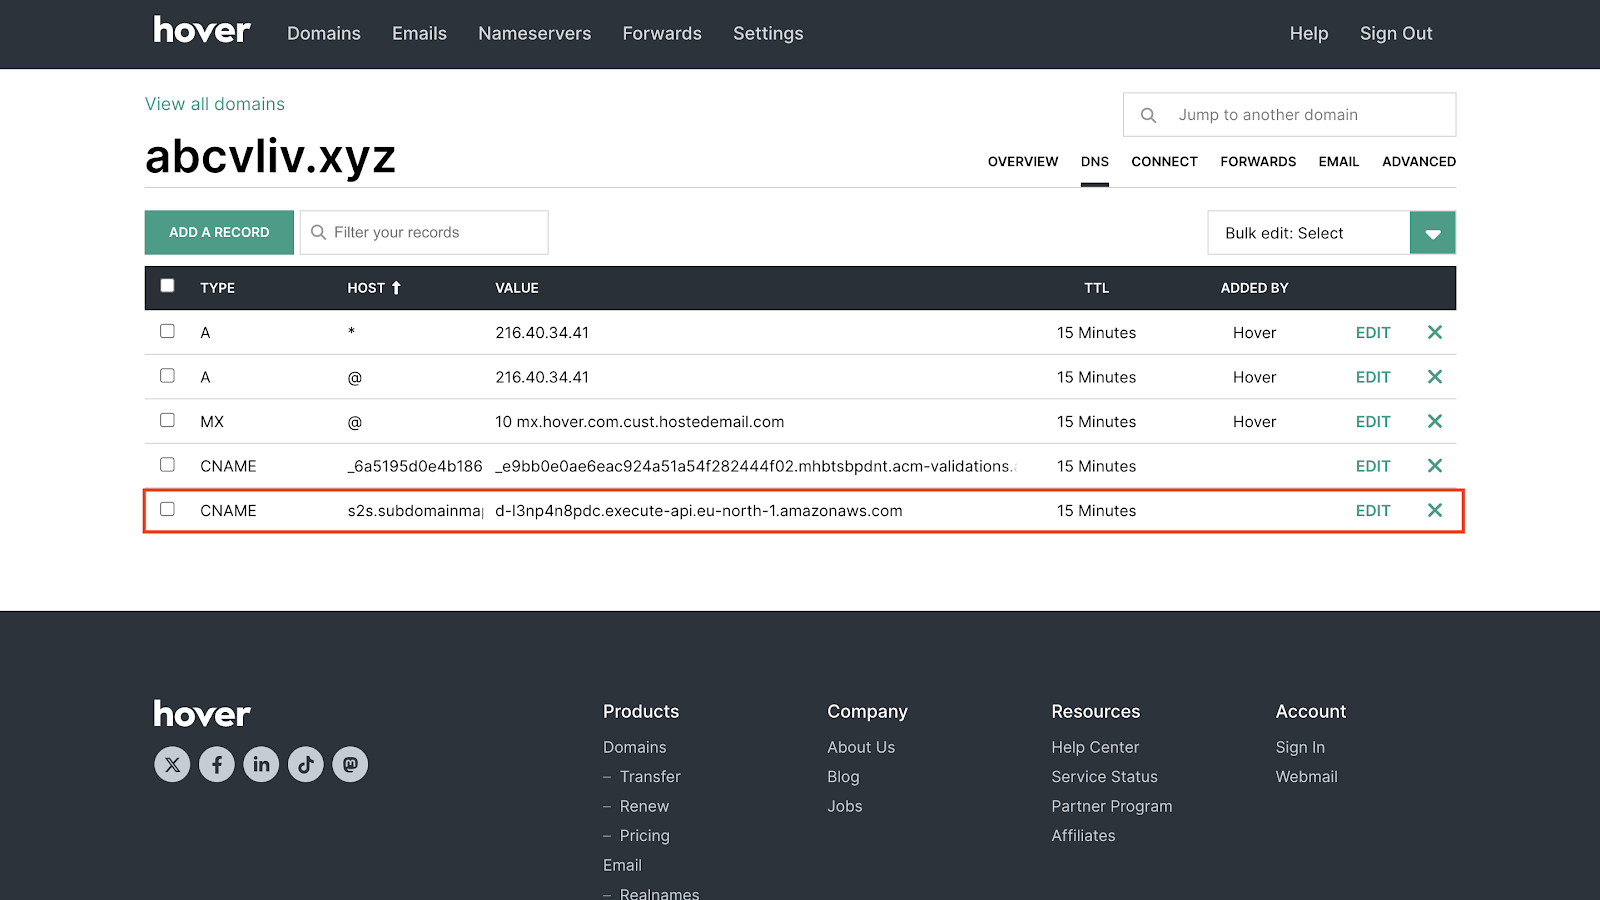
CNAME Records
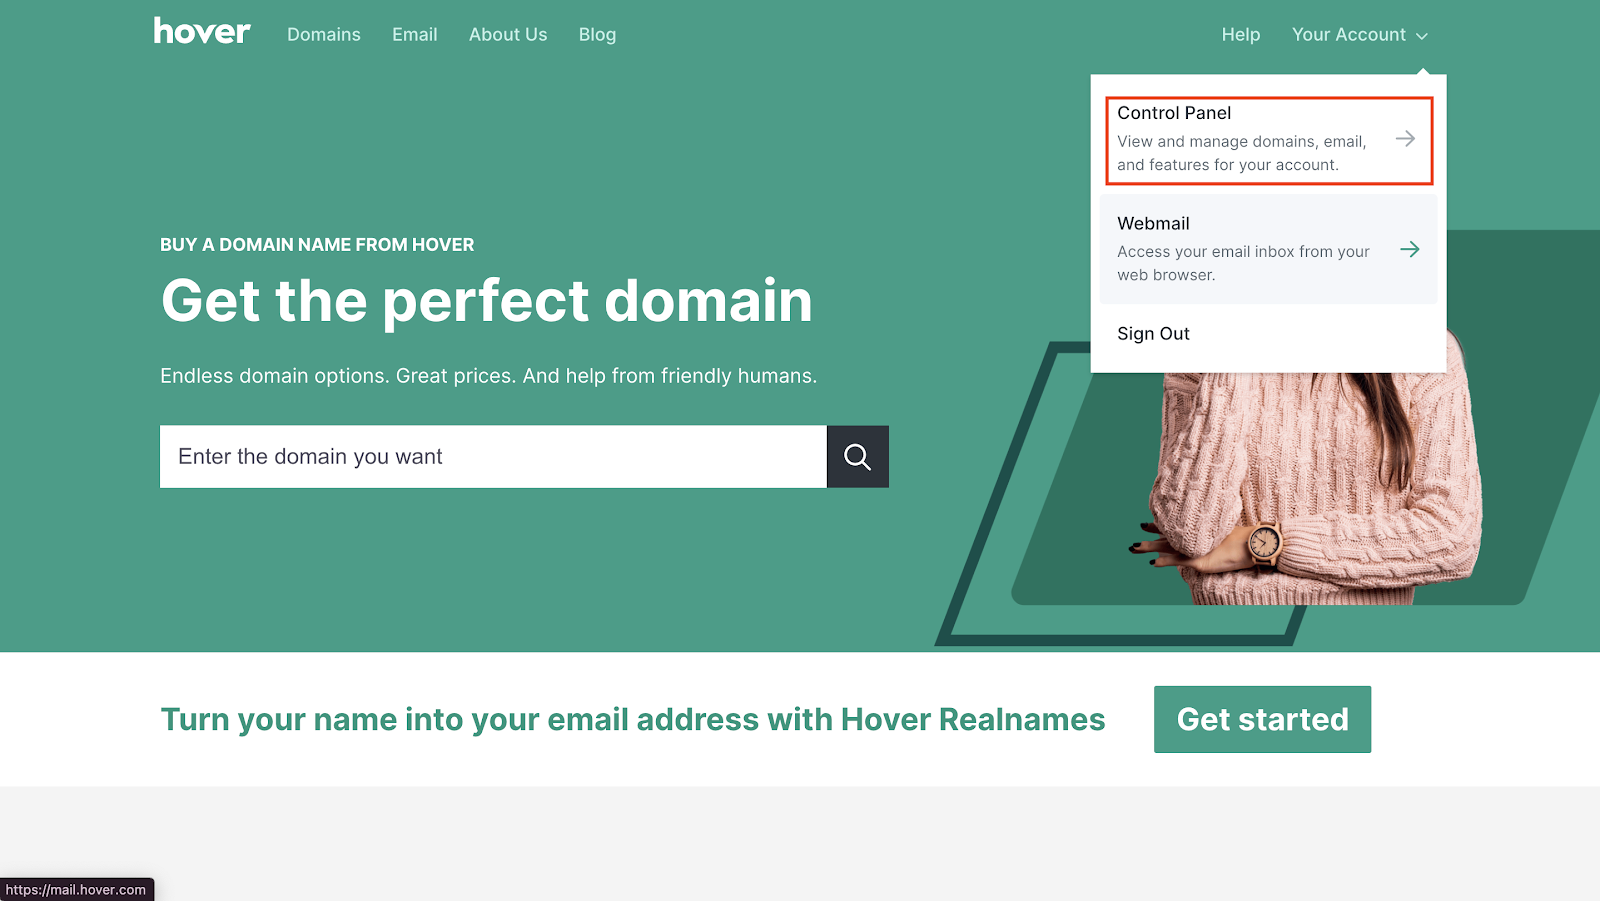
Step 1: Open your web browser and navigate to hover.com.

Step 2: Once logged in, go to your account’s control panel.
Step 3: In the control panel, click on the “DNS” tab.
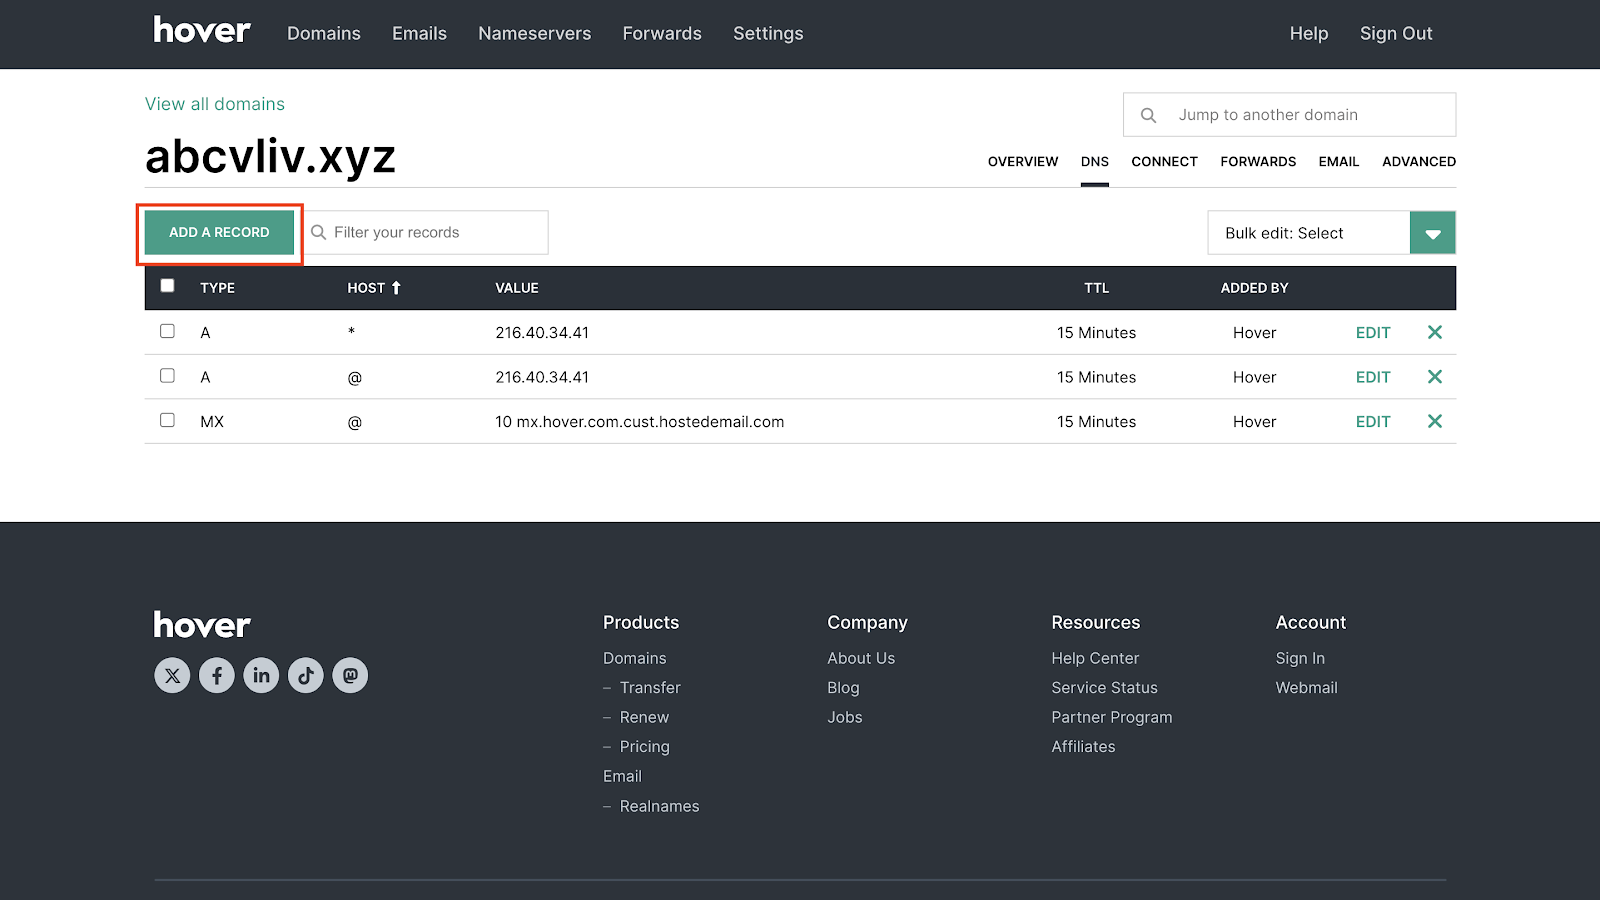
Step 4: Click on “Add a record.”
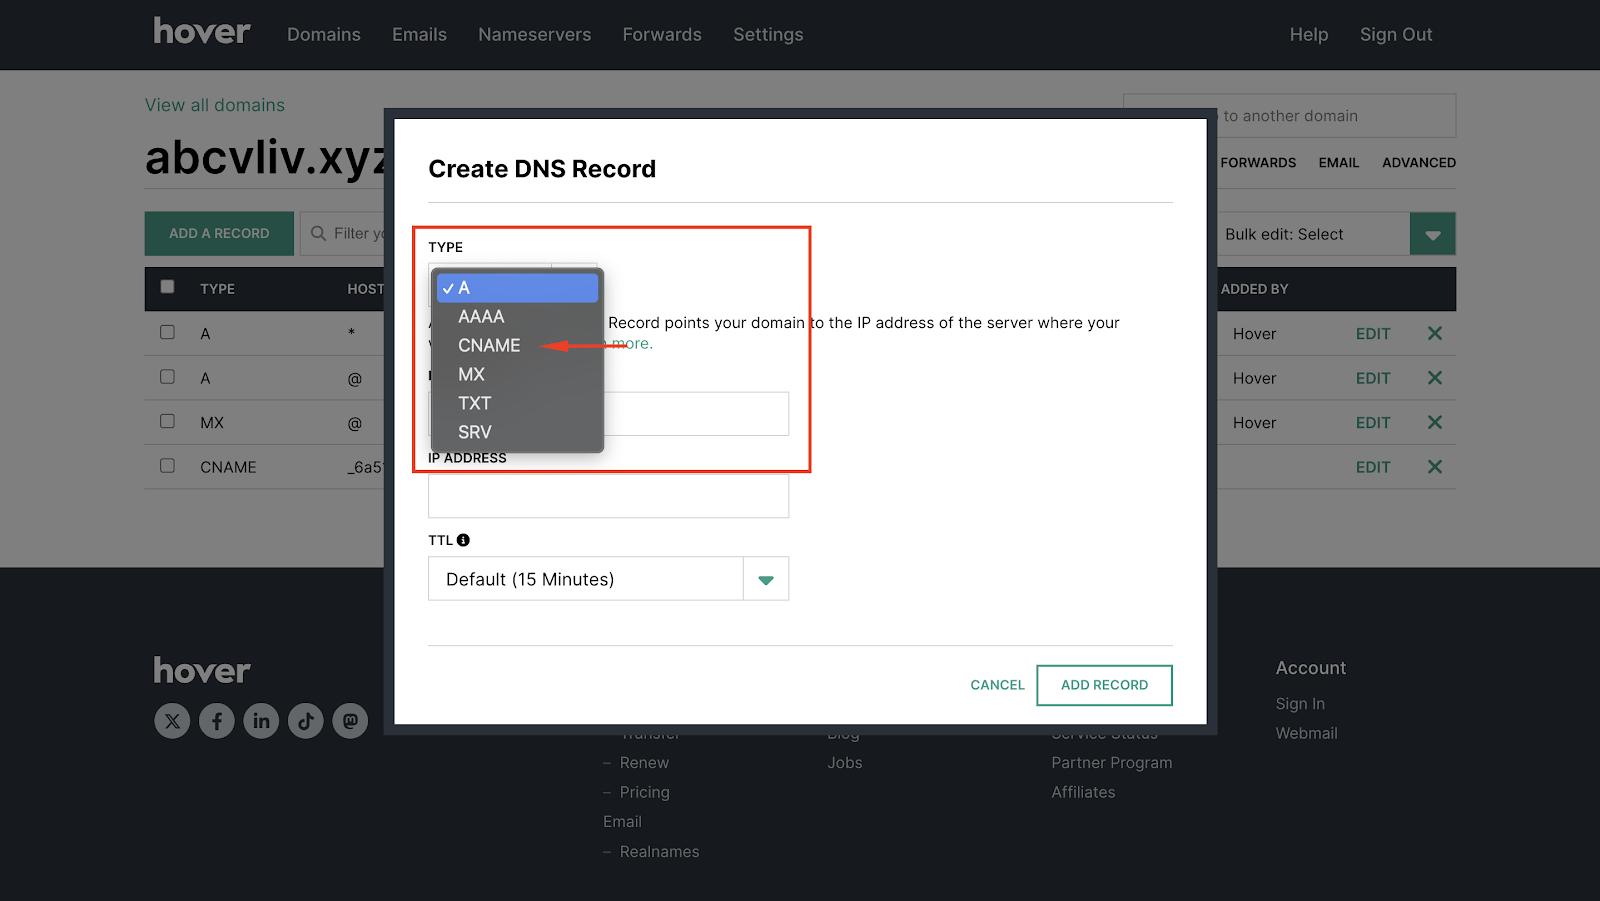
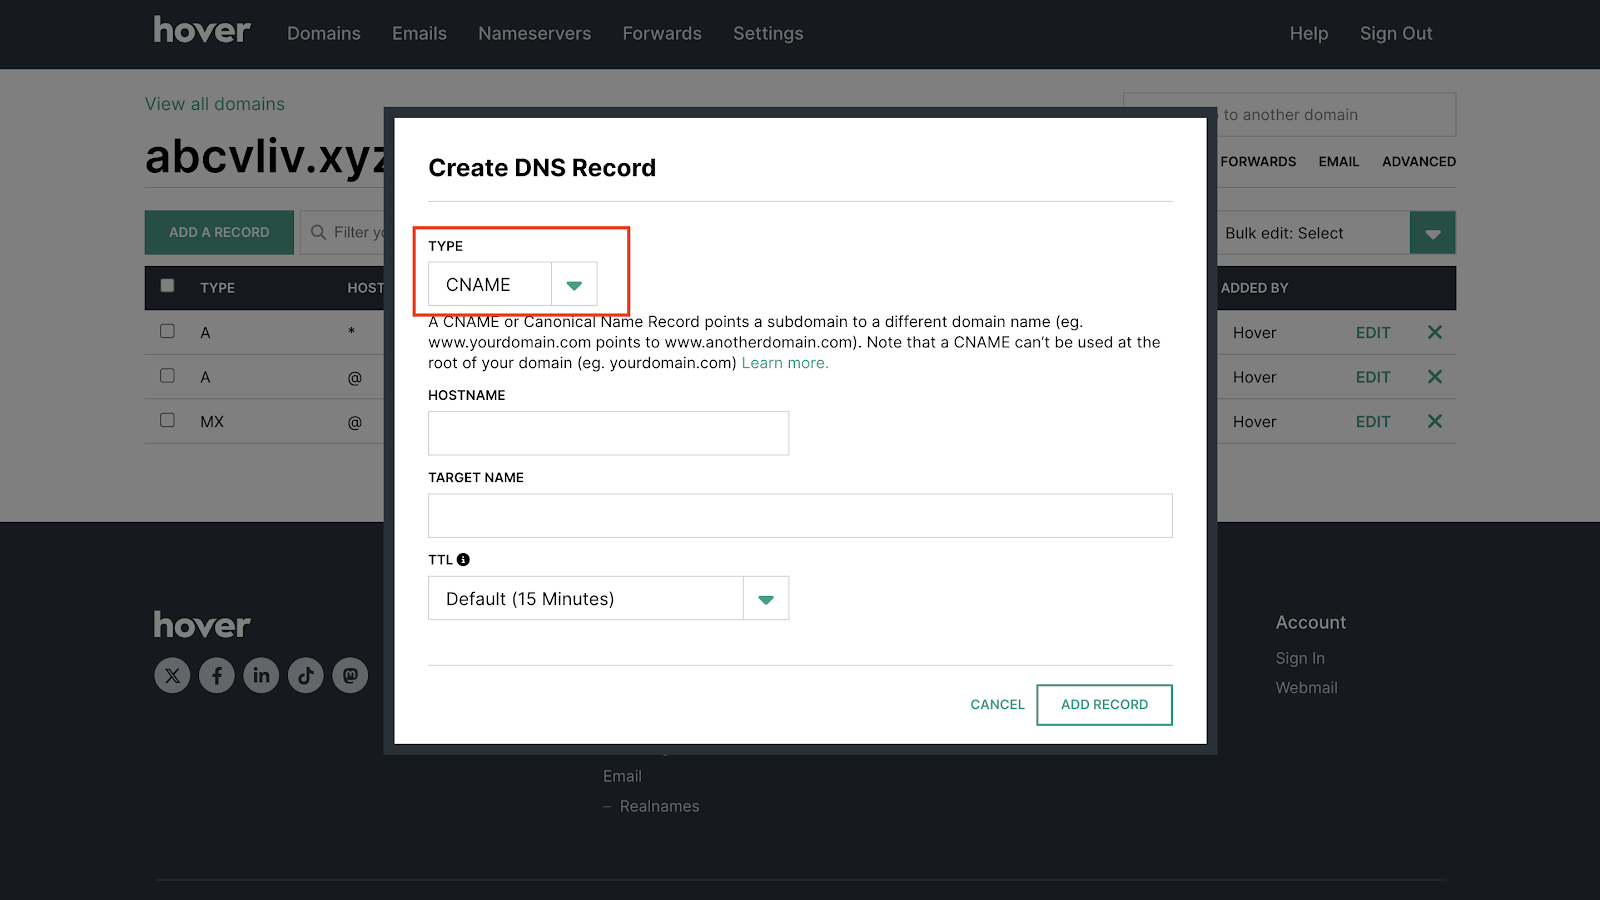
Step 5: Choose Type: Select “CNAME” from the dropdown menu.
Step 6: Copy the CNAME record value shared by datahash and paset teh same in the domain manager
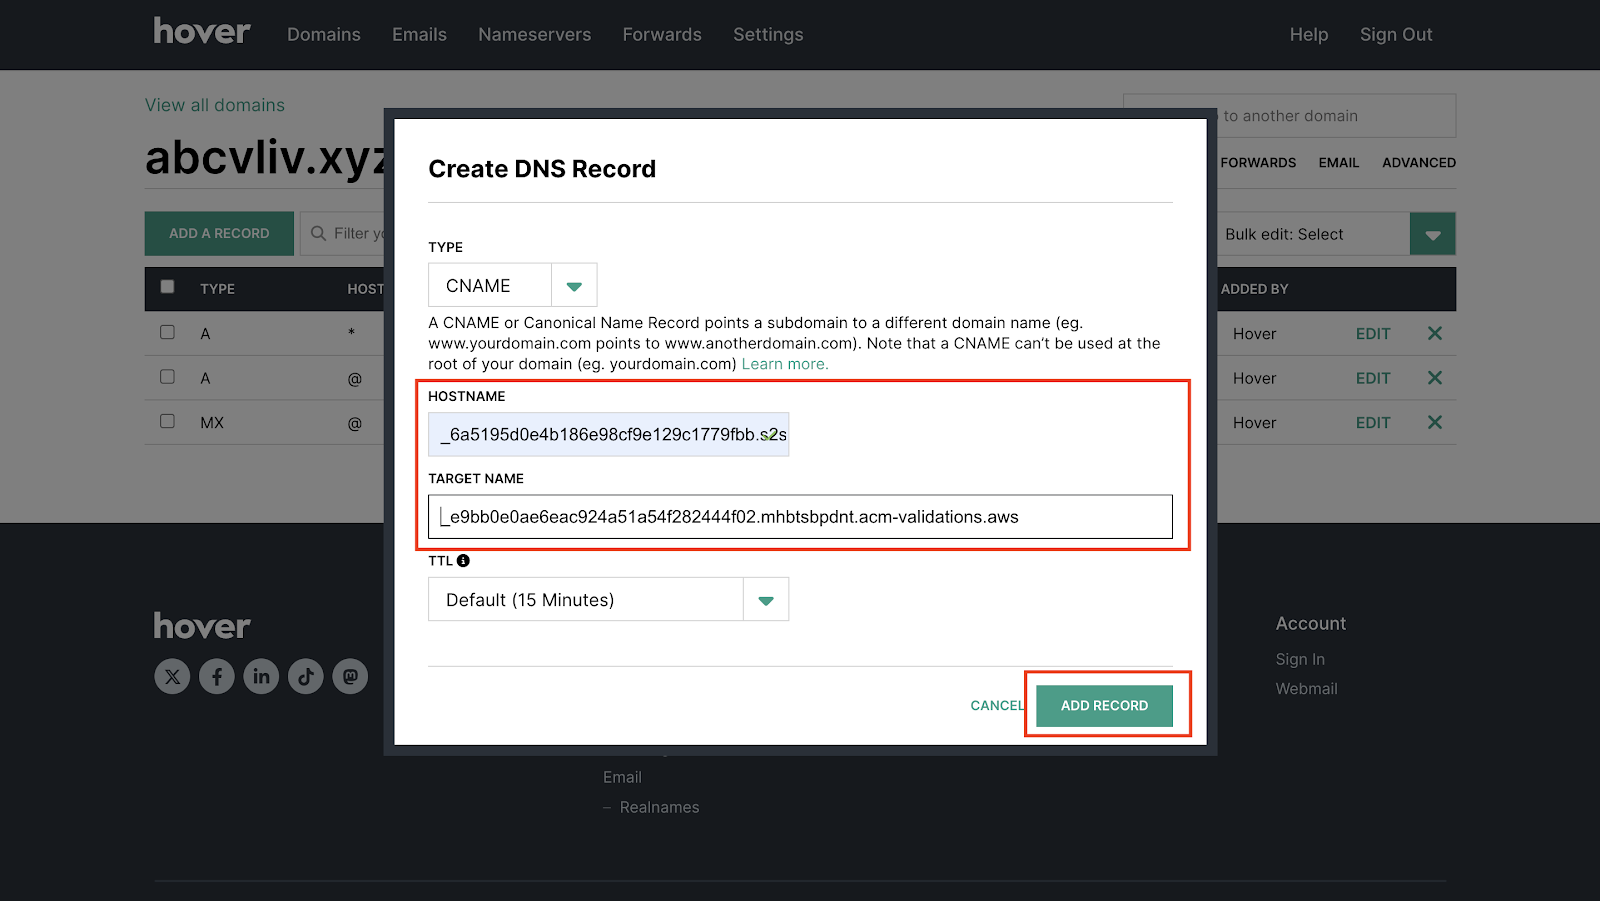
Step 7: Save the Record: Click on the “ADD RECORD” button to confirm the entry.