
NS Records
Step 1: Login to your IONOS account. After login click on the Domain & SSL card.

Step 2: Click on Adjust DNS Setting present at the bottom of the screen
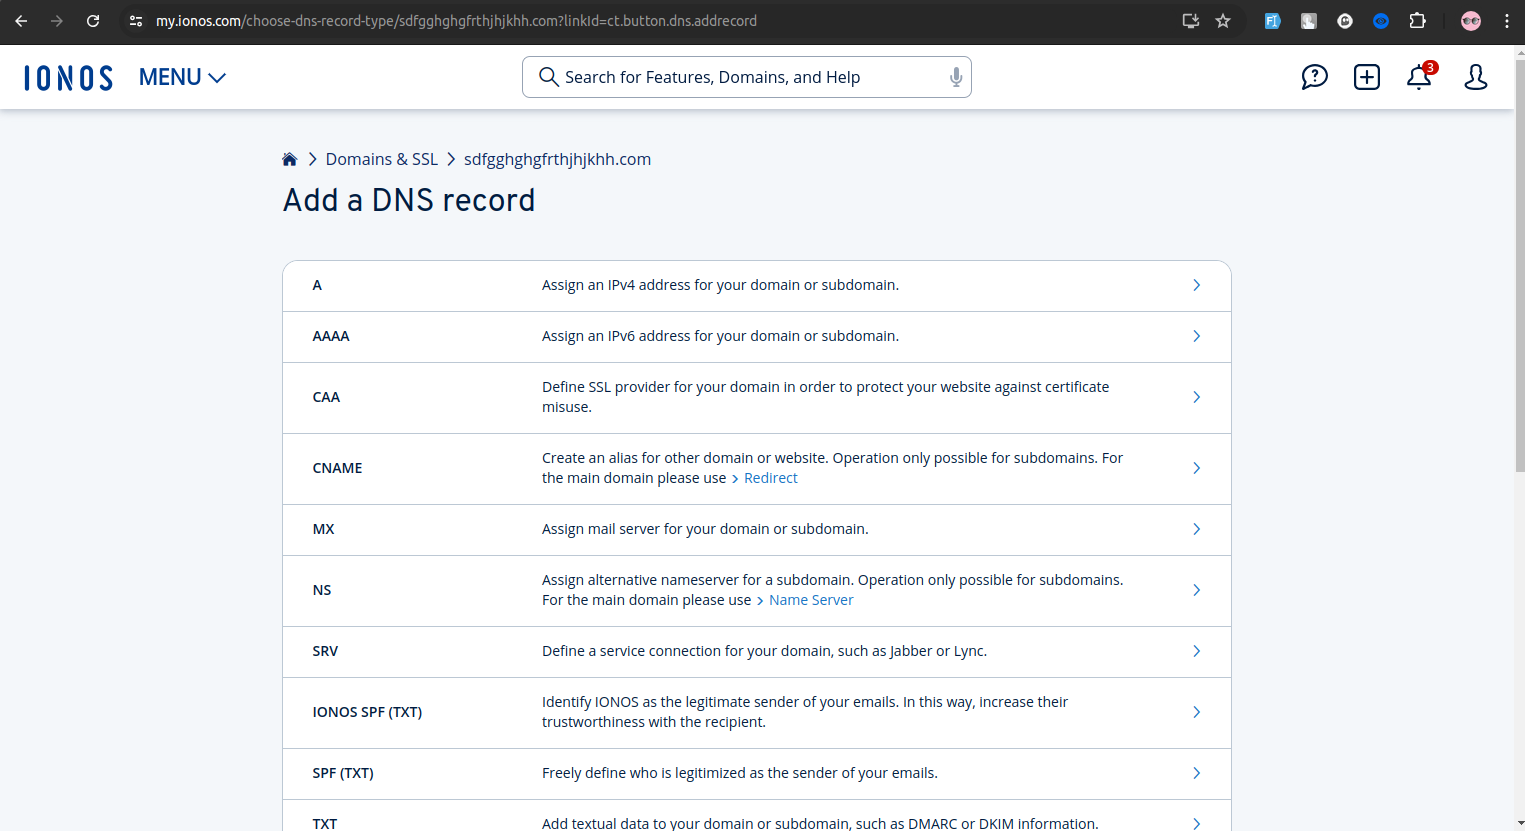
Step 3: Click on the Add Record button
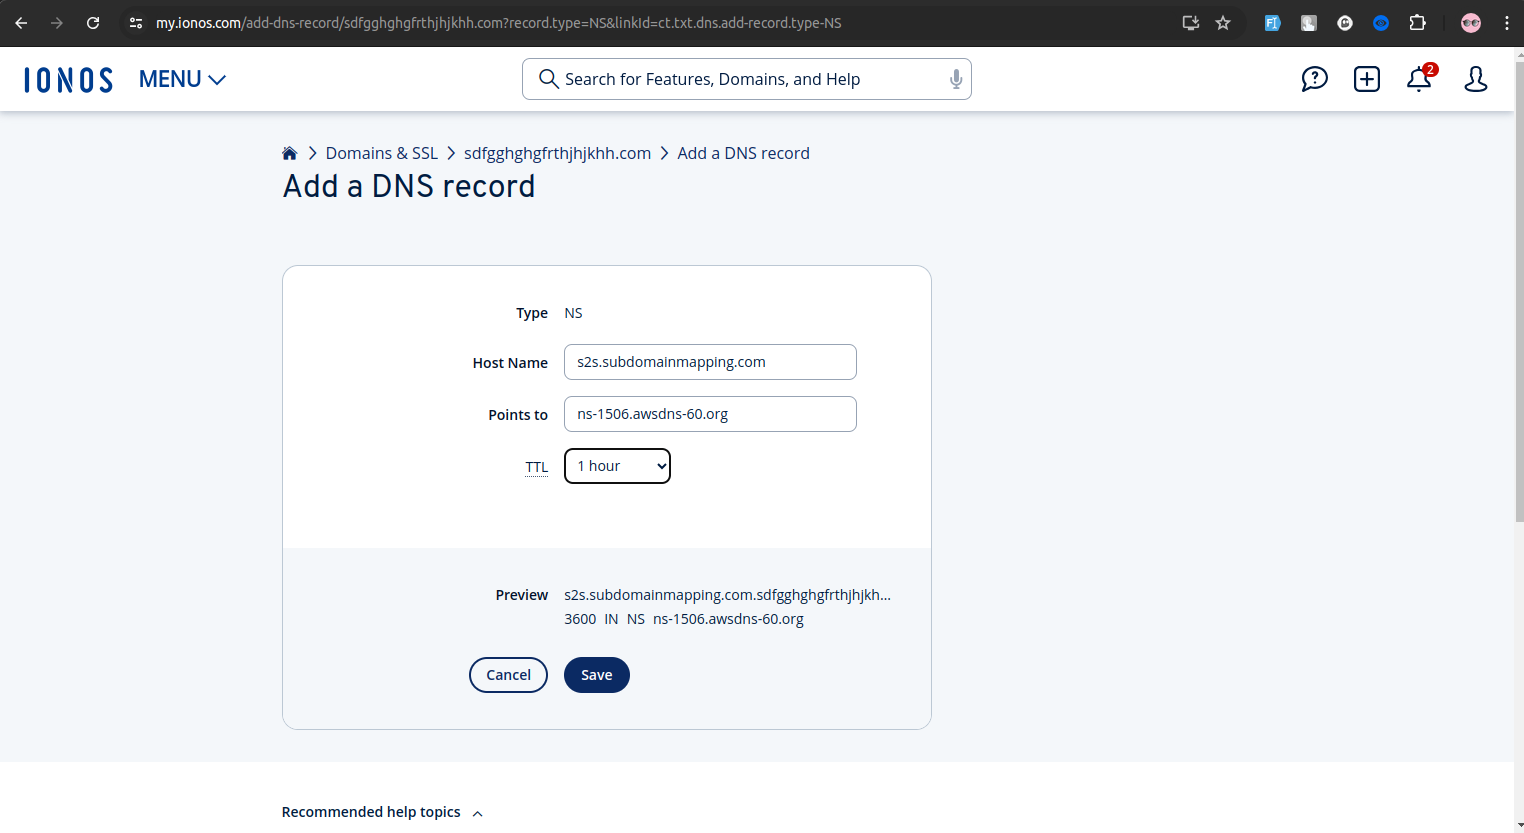
Step 4: From the available options, choose the NS (Name Server) type record.

Step 5: Enter the NS Record based on the information provided in the Datahash set-up window. Repeat this process for all 4 NS records.
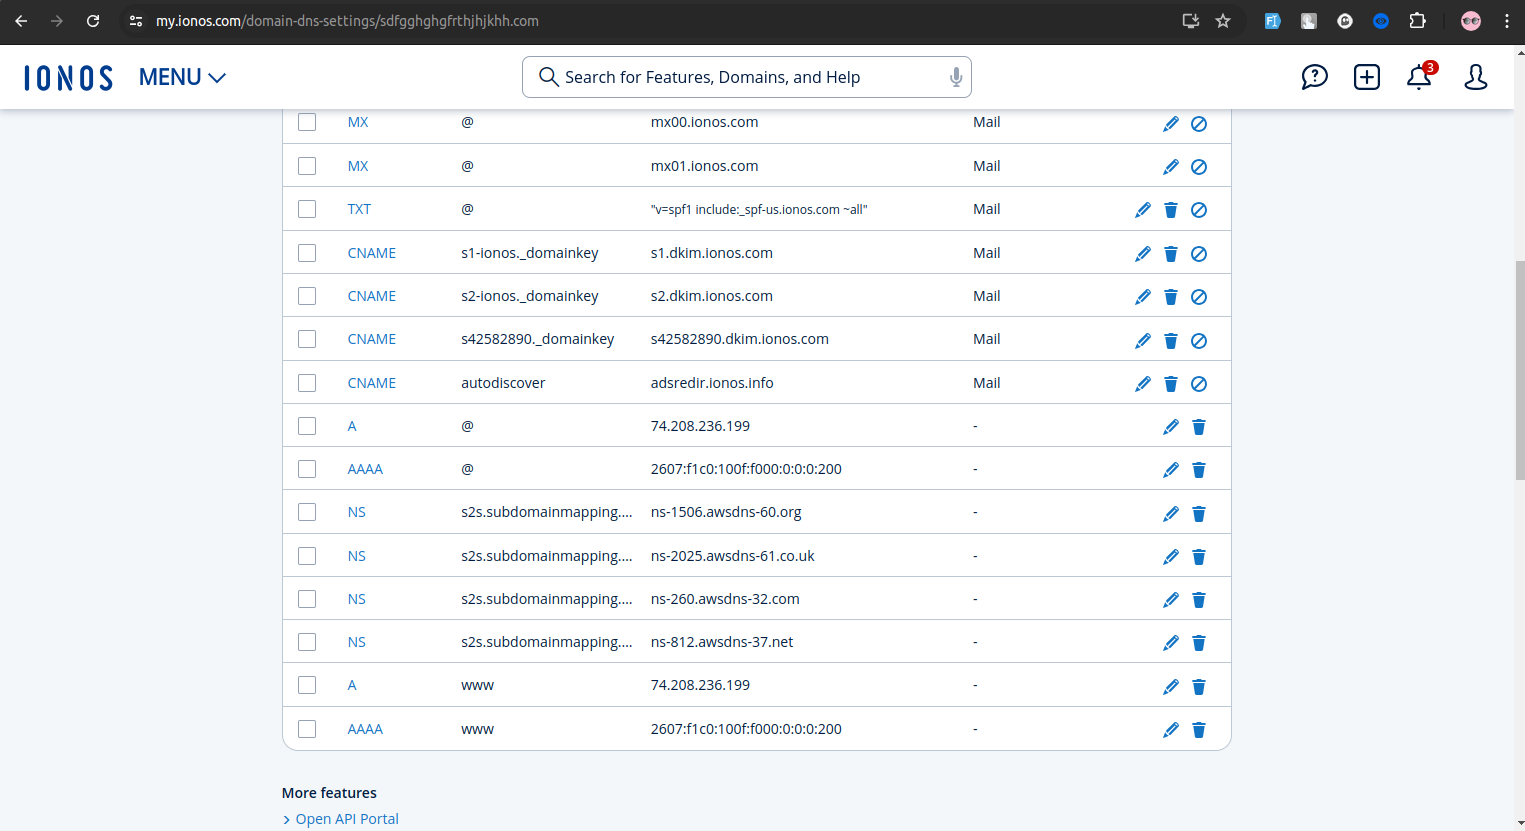
Step 6: Check if all NS records are added.
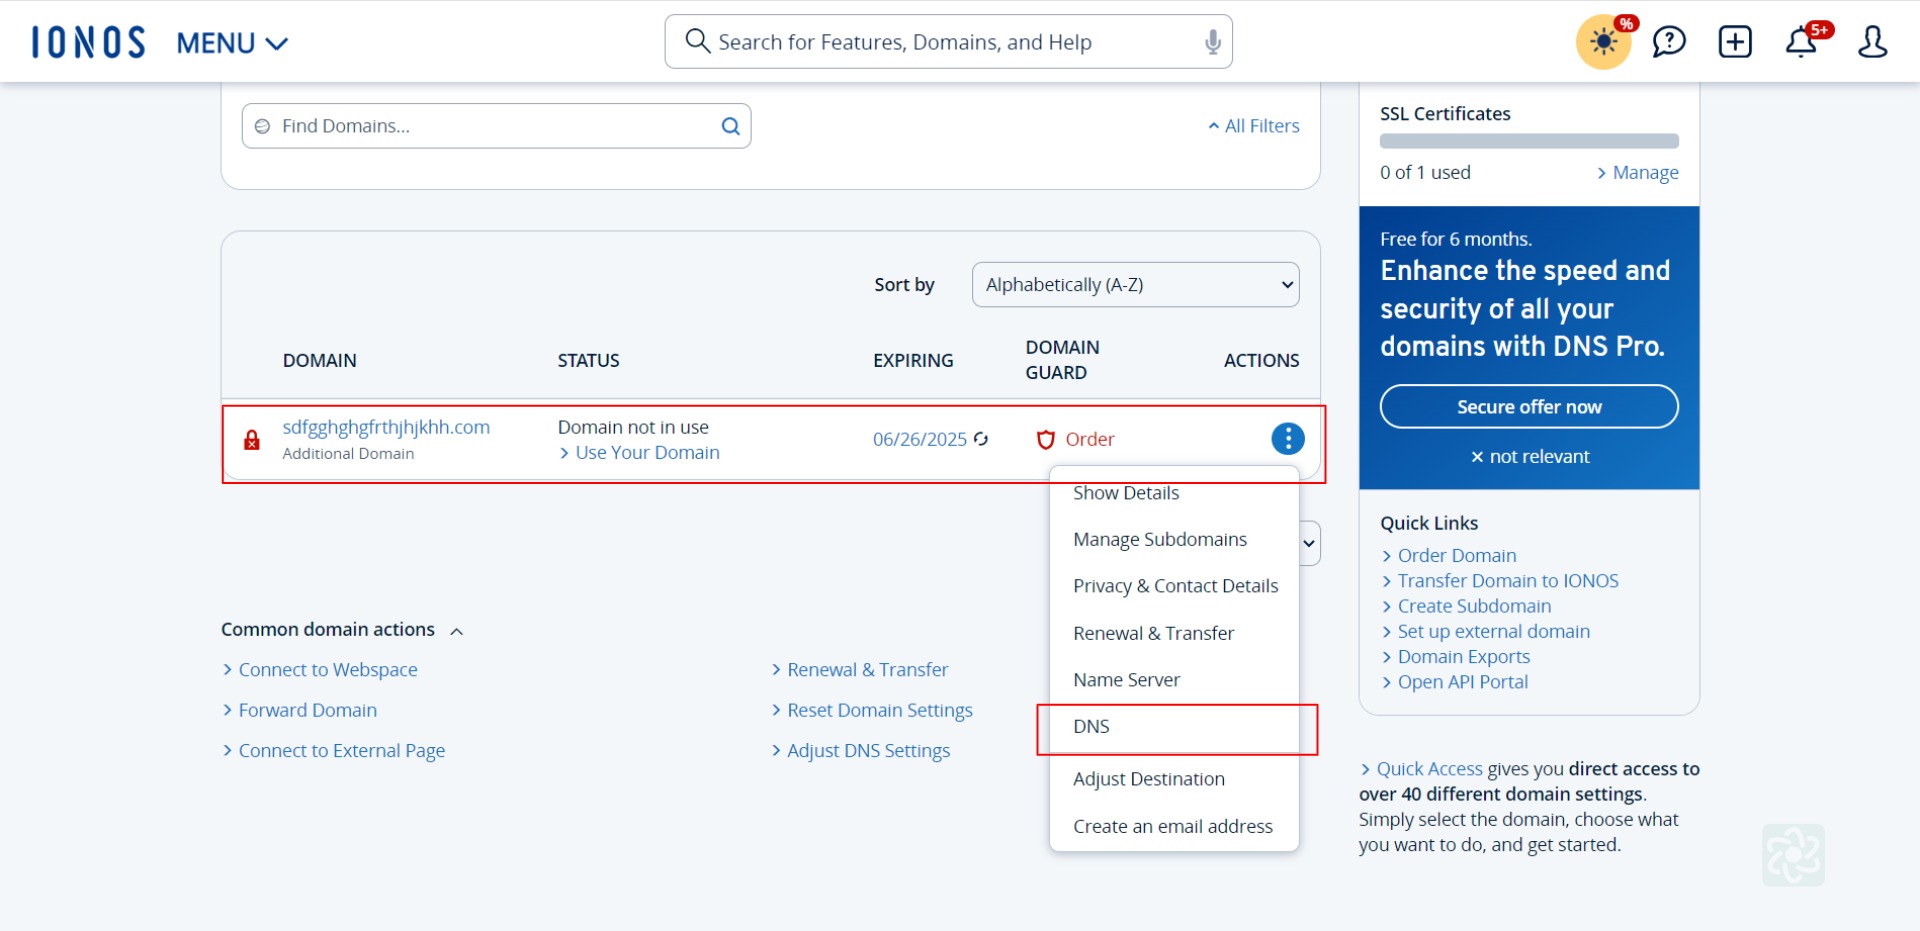
CNAME Records
Step 1: Login to your 1&1 IONOS account. After login click on the Domain & SSL card in Menu section.
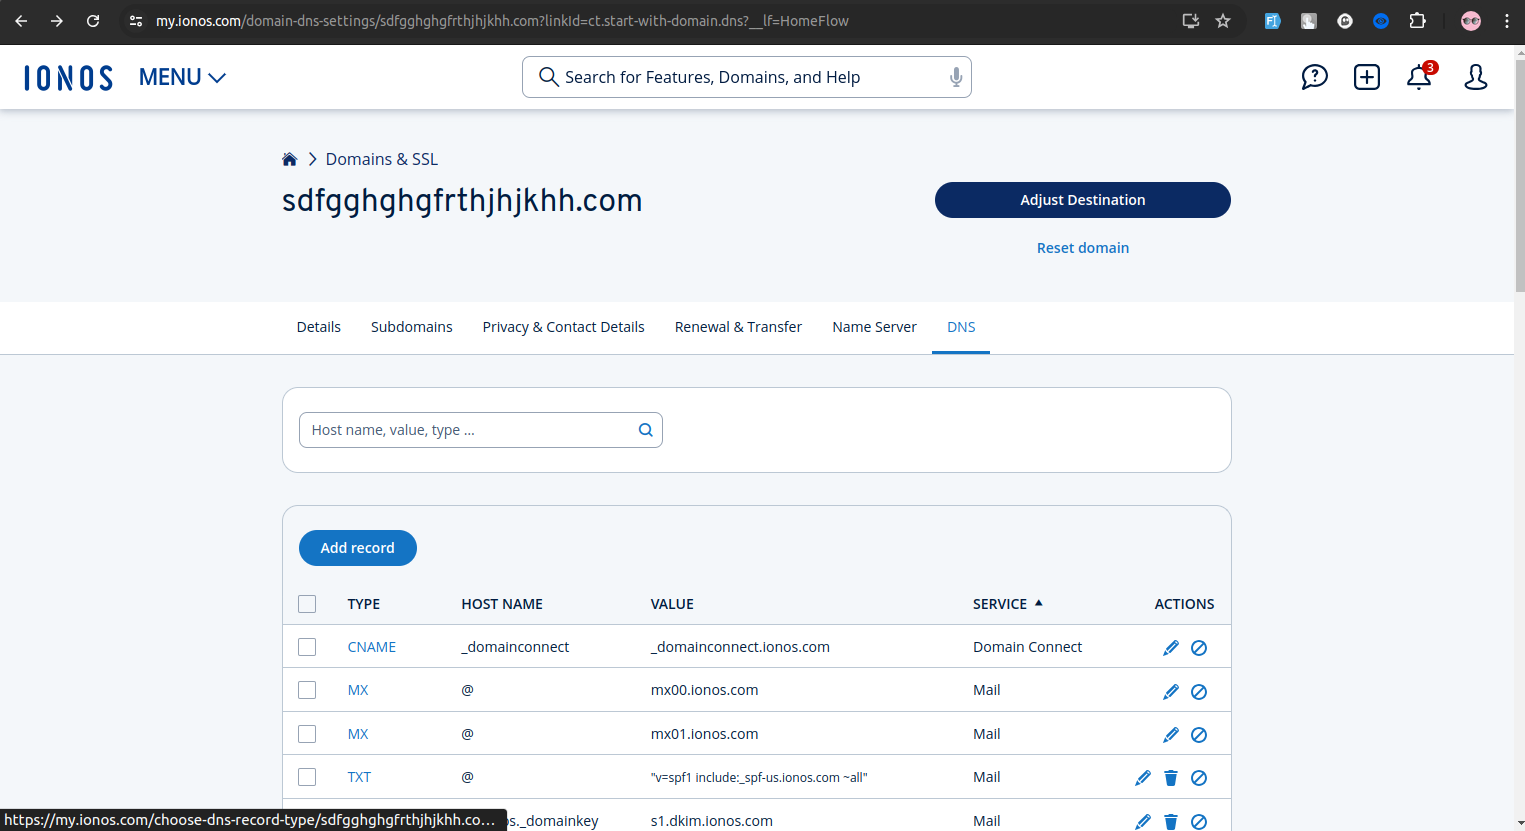
Step 2: Choose the domain where records are to be added & Click on DNS of that domain
Step 3: Click on the Add Record button
Step 4: From the available options, choose the CNAME type record.
Step 5: Copy the CNAME record value shared by datahash and paste the same in the domain manager. Click on Save.

Step 6: Check if the CNAME records are added.

Notes: Ideal TTL should be at least 1 hour.